In case you missed it, there are several options for purchasing texture paste. The products are offered separately, or as part of the Boutique Deluxe Bundle which includes the Palette Knives, larger 3.9 jar of Opaque Matte, a package of Stencil Sheets and a Sugarplum Shimmer Brush. You save 10% by purchasing the bundle.
We also offer a Texture Paste Trio of 1 oz jars in Transparent Matte, Transparent Gloss and Opaque Matte.
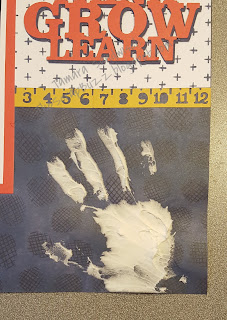
I was planning another technique and a school theme, but before I finished with paper selection I had a new idea. Could I make a hand print with texture paste? The answer is YES!
Texture Paste How To
I played with several variations, but a straight forward method was the best choice. Initially I was looking for a fine image like what you would expect with ink, similar to a finger print. The paste gives a fun textured image similar to paint.- "Butter" your hand with one of the Palette Knives, just like you would do bread. This should be a medium thickness. About half will transfer to the paper; the other half will remain on your hand.
- Just like stamping, press your hand straight down and after a few seconds, remove it straight up.
- Happy with your image? Texture Paste is great for us perfectionists because it's never going to be "perfect," so unless you're missing a finger, it's probably good to go!
- Scrape the excess paste off your hand with the Palette Knife or clean with a baby wipe, then wash thoroughly with soap and water. The paste is non-toxic in addition to acid-free.
- Don't forget to replace the lid on the jar and clean up your knife and work area while the paste is wet. Set your project aside to air dry. I let mine sit overnight.

Note that I left the paste white, straight from the jar. If you mixed the paste with color, you might have a colored hand for a few days!

There are some tips below that cover a few issues I had when putting this page together. Please leave a comment before you head over to see what Vandra has to share.
Tips for Easier Tool Use
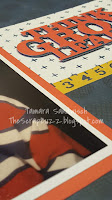
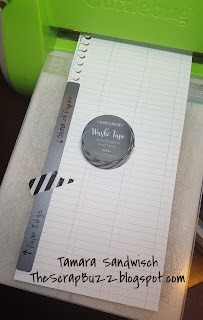
Cuttlebug Tip: At the Annual CTMH North America Convention this year, we were told that on the Thin Cuts notebook edge it's hard to tell which is the positive and negative images. So, it's helpful to mark your die once you know which is which. (BTW-Sharpie will come off onto your C plate.) Also, to repeat the cut on a longer piece of paper, overlap just the very ends of the die. You may wish to use a piece of Washi Tape to hold things in place. I also suggest you start in the middle of the paper, then fill in each end so you don't have a little short piece to cut.Tip #2: The Texture Paste can cause your paper to warp. You may be able to prevent this by using Washi Tape again. Attach your paper to the All-Purpose Mat. I didn't remember that so my paper was no longer flat (left side).
I fixed it by spraying a little water on the BACK of my paper with a Spray Pen. It was moist, not wet. Then I washi taped it to my Versamat and let it dry. That did the trick (right side)!
Thanks for stopping by!
Tamara
Products Used
- Grateful Heart paper pack
- Seasons Mix-In paper pack
- Cardstock in Candy Apple, White Daisy, Saffron, Sapphire
- Exclusive Inks Stamp Pad in Sapphire
- Cricut Cuttlebug
- Artbooking Cricut Collection available in Digital or Cartridge version
- Make It From Your Heart Volume 3
- Thin 3-D Foam Tape
- Palette Knives
- Opaque Matte Texture Paste
- All-Purpose Mat
- SureCut Deluxe Craft Paper Trimmer
- Bonding Memories Dual Action Glue Pen
- Marvy Uchida LePen Journaling Pen
- Candy Apple Striped Ribbon
- Christmas Countdown or 'Tis the Season Deluxe Bundle
- Thin Cuts - Stitched Circles
- Thin Cuts - Basic Circles
- Thin Cuts- Block Alphabet
- Thin Cuts - Decorative Borders


