Tuesday, December 15, 2020

Blissful Brackets - CTMH Technique Blog Hop


Welcome to December’s Technique Blog Hop. This month we are focusing on brackets. If you stumbled upon us, just click the links to hop from post to post until you end up here again. The complete list of participants can be found HERE.

If you’ve come from Brandi’s Blog, you’re in the right place.

It’s been quite a while since I participated in this hop. We went a little over-board with the go home idea and have been driving between Oregon and Ohio to finish a major remodel on an old house. That sale closed last week and now a family has a new home for Christmas! And we also decided to move back home to Ohio. After several months of living with relatives, we may have a new address in the new year.

Right now, most of our stuff is still packed. We couldn’t find warmer clothes so I had to do some shopping for coat, gloves, boots. The winter weather is different in Ohio than Oregon! I have more supplies unpacked than clothes, but still can’t seem to find the “one thing” I need. Here’s the card I made:


Brackets are a popular shape and pop up in a lot of different places, like this sticker from the Jingle Joy suite!

.

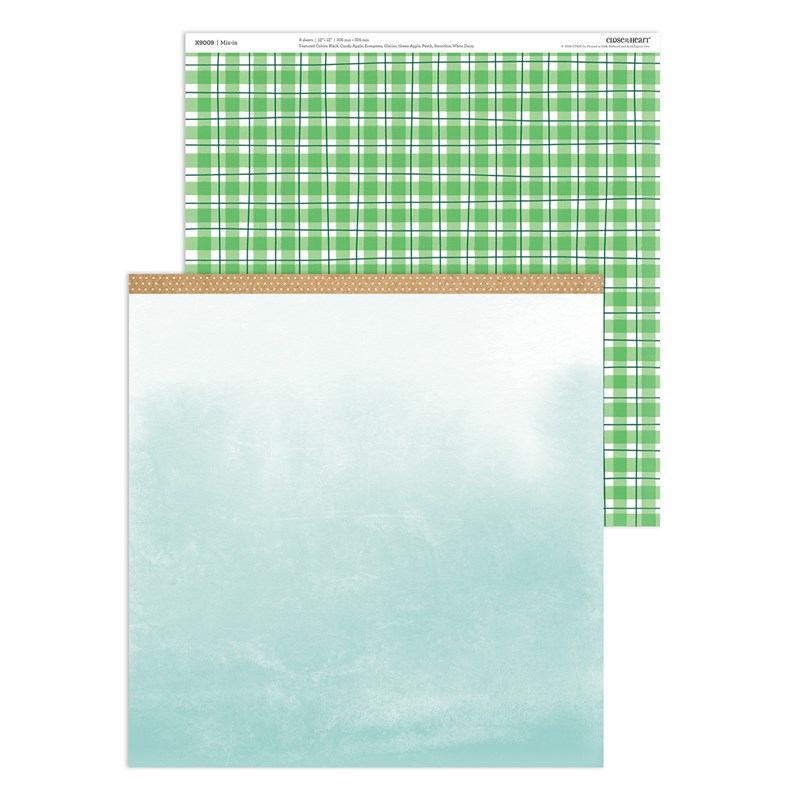
There are also quite a few bracket shapes in the Close To My Heart Cricut Collections. I pulled in several while I was planning my project, and even used Design Space to design this card. This is a 5x7 card. Here’s is the DS link for my file:  


I used Diamond Stickles to spice up the Raspberry strip. This technique is taught in the Jingle Joy Cardmaking workshop. 


The sticker was “unstuck” with the Anti-Static pouch and popped up with Thin 3-D Foam Tape. The regular thickness might have given it better dimension, so I went around the edge with Green Stickles. Since it was already attached, I slid the All-Purpose mat under the edge to protect the rest of my card.


If you don't have a Close To My Heart Maker (Consultant), you can shop from my website.

.

Perhaps you will see some of these other brackets during the hop. They gave me ideas for other projects. One of my favorite Cricut cuts this time of year is the gift card holder. The yellow shape is the gift card holder. The black rectangle represent a regular (credit card) size gift card. 


When I first used this shape, I wasn’t sure how to fold and glue it. The W diagram shows how to fold it. Put adhesive in between the two middle sections, just at the bottom edge(s) near the front and back sections. There needs to be space to slide in the gift card.


Making gift tags can be faster, simpler, and easier with brackets! Whether layered or not, just cut a sheet of these shapes then stamp “to” and “from.” 

These are standard size cards with a bracket cut out. I made 3x4 and 3.5x5 black rectangles to represent photos. You can use these cards when featuring a picture on your Christmas cards. Remember, you can always adjust the size of the opening, or the card itself, to fit you photo.

Please leave a comment before continuing to see what Cat has to share

Sunday, November 1, 2020

Here's the deal...

How does the Stamp of the Month program work?


Every month there is an exclusive D-size stamp set that is available to purchase ONLY during its featured month. There are never any "left overs" that you might see like after a seasonal idea book retires. They don't show up in the clearance section. If you want that stamp set, it must be purchased between the 1st and last day of the month in which it is offered.

The retail price of a D-size stamp set is $18.95. It is always available to anyone at full price; but, HERE'S THE DEAL:

When your retail total is $50 or higher, you can purchase the SOTM for only $5!!

That's pretty good! Do you want better?? VIP Customers can get the SOTM for FREE when their total is $50 or more. The best news is that VIP customers can get this deal EVERY month!! That's over a 25% savings (on a $50 order) BEFORE any other VIP perks. 

Want two? If you want a second SOTM for a friend, or to have double the letters of an alphabet, etc., additional sets are $5 each for every additional $50 retail spent.

Saturday, October 10, 2020

Adding a little more CRAZY to 2020

 Because a world-wide pandemic wasn't enough excitement this year, we decided to move across the country. Greetings from Northwest Ohio! We are here, but I wouldn't say we're settled. Almost ever thing is still packed, we're staying with family, both Oregon properties are sold and the Ohio flip is on the market. We're starting our due diligence on a distressed property, nothing like the flip, but it would still scare normal buyers. We'll see how it goes. 

What does everyone think of the new 2020-21 Core and Seasonal Sept/Oct Catalogs?!?!

I can think of several people who should be excited about all the mixed media items. I like all the paper suites and am IN LOVE with our Color of the Year Blue Belle!!


The other new colors are:

  • Desert Rose
  • Cinnamon
  • Scarlet
  • Flamingo
  • Grape
  • Avocado (which I can now spell correctly)
  • Sundance
Way before anyone knew about Covid, the CTMH Corporate Office was planning some exciting changes that took place on October 1. If you haven't checked out the new VIP Customer program, click the tab above. I think this is going to be perfect since Home Parties have been few and far between in general. Now that we're all 6 feet (or 2000 miles) apart, it's even more appropriate. Did you catch my new title? Consultant are now called Makers! I'm still consulting independently and running my business the way I want to, but the new name is kind of fun. Now, if I can only get somethings made!!

Share your crafty projects on my Facebook page! I need your creativity and inspiration. I have not been able to do much making but am going to break out my Craft with Heart Card Subscription ASAP. This is perfect for my life right now: everything is in the box and all I needed to find (which I did) was adhesive. 

I'm looking forward to getting together with you virtually and scheduled a Christmas Card class for October 24. See the details under Events to Join.

Friday, May 15, 2020

Stencil It! CTMH Technique Blog Hop


Welcome to our May blog hop! You've come from the blog of Hayley DyerTo continue the Hop, just follow the links from blog to blog until you get back to where you started. If you get lost, you can find a list of participants on Melissa's page. This month we are highlighting stencils. That may sound old school to you, but I'm sure you'll find new ideas for personalizing your art work! Before showing you my project, I have an announcement to make:

...And the award for the Official stamp set of the Pacific Northwest 
goes to..."Make a Splash!!" {Applause}

Make a Splash
I knew I needed this set as soon as I saw it in the May/June catalog. It is pretty adorable even if you don't live in a rain forest. Don't you think?? Plus the sayings are appropriate for almost anyone, anytime and I was surprised by how perfect the set is for these crazy pandemic times. If you need more rainy weather stamps, check out "When Skies Are Grey."

I wanted to showcase this set and was also inspired by the Blue Skies cardstock, part of May's special for National Scrapbooking Month. I love the UV coating and wanted to make something similar. 

Can you see the raindrops? 
This card pattern is #7 in Make It From Your Heart Volume #4. I always think rain boots are yellow; too much Curious George as a child I guess! I paired it with one of the papers in Stitched Together. Do you see anything stitched or quilt-related in this design? That's what I love about our B&T Duos and paper packs: any pattern that highly themed is usually universal on the reverse side. Can you see the upside-down raindrops on this paper?? I think they're supposed to be flower petals. That would be something else I could do with my stencil!


Here's how I made my card:  The rain drops are from an overlay image in the Cricut Artistry Collection.  In Design Space, I added the image then used [Contour] to hide the outer line of the image; this gave me just drops to cut out. I used [Duplicate] to copy the image, next I used [Contour] again to "remove" a few drops at the bottom. I made a copy of the edited image with [Duplicate]. Now I had three images, the original, and two edited copies. I lined these up by utilizing the [Position] coordinates. Finally, all three images were "connected" with [Attach] to cut as one item. When cutting the stencil, I made sure to move it over so that there was at least 1" around all three sides when finished.

Before putting the raindrops on my paper, I stamped the two sentiments in Sapphire ink. I rubbed the Anti-Static pouch over this piece and then tacked it in place on a piece of desk pad paper. The stencil was positioned over the cardstock. The drops are fewer near the bottom so I kept away from "splash" but went right over the sentiment at the top. I used the VersaMark pad right on the stencil. After removing the stencil, I used clear embossing powder and embossed as usual. 


Note: Your stencil will be sticky from the VersaMark ink. I first tried cleaning it off with Spritz and a rag.That wasn't bad, but I had so many layers from experimenting, it wasn't quite enough. On my way to the sink, I passed some baby wipes. The wipes worked, at least with my pre-wash. I wouldn't use the chemical disinfectant wipes everyone is hoarding right now, but alcohol-free, mild baby wipes may work. Otherwise, go with my first thought, clean it with a mild soap and water.


To make the puddle at the bottom, I grabbed my Mint Shimmer Brush.


Inside, is another boot, this time stamped with Mink instead of Black so the image is defined, but not overwhelming the sentiment. These could have been stamped right on the card base, but I wanted the flowers to be a separate piece so that the marker didn't show through the back. 


Now, I would never have fussy cut these flowers out of the paper. Even cutting out the boots would have been pushing it, and those are a much simpler design. But with Thin Cuts, it was no problem! It's one of the main reason I bought this stamp set, I can use these flowers for many other projects. The flowers are colored with Tri-Blend markers. 
*I've since decided that Green Turquoise (light end) is a better match for Mint. I'd call the Dull Green colors > Green Apple (light), Sage, and New England Ivy (light). For Sweet Leaf I like Citrus Green (light end). Those of us in the matchy-matchy OCD world can get really freaked out about color matching! But, the truth is, on these tiny images, none of which are even shown with the patterned paper, it doesn't matter (too much!).

Please leave some love in the comment section below!


Thanks for stopping by!! Next, head over to see what fabulous-ness Maz Wood has for you this month.

🛒🛒Ready to shop? Head to my website to find the products I used:

  • Make a Splash stamp set (available with or without Thin Cuts)
  • Stitched Together paper pack (available with or without sticker sheet)
  • Lemonade Cardstock
  • White Daisy Cardstock
  • Mint Shimmer Brush
  • Intense Black ink pad
  • Sapphire ink pad
  • Mink ink pad
  • Tri-Blend markers (see colors above)
  • VersaMark pad
  • Anti-Static Pouch
  • Clear Super Fine embossing powder
  • Heat Tool
  • Stencil Sheets
  • Card Bases and Envelopes value pack
  • Artistry Cricut Collection (use this link to shop Cricut)


Wednesday, April 15, 2020

Heat It Up! Technique Blog Hop


Welcome to our April blog hop! You may have arrived from visiting Miss Carrie. To continue the Hop, just follow the links from blog to blog until you get back to where you started. If you get lost, you can find a list of participants on Melissa's page

Spring has sprung and around here, we haven't even had the April showers yet, so as the weather warms, let's Heat It Up! with some heat embossing!

 I made this card with the new "Let's Stay Home" stamp set Close To My Heart has created for documenting the Covid-19 pandemic. Many of us are embracing the idea to "Stay Home and Create!" I've been sending extra cards to keep in touch with family and friends and I have an online crop starting April 15 (contact me for more info).


I also used the current Mix In paper pack and both the stamp set and paper from our "These Are My People" special. The patterns is #6 from Volume 4 in our How To series Make It From Your Heart.

Have you noticed that brads are back in our product line?? You'll need them for making spinner cards and some adorable new things coming in May. Right now, silver is the only option, but what if you want to use them in another color for artwork? Did you know...you can color brads with heat embossing?! Let Me Show You How...

One of the amazing things about embossing brads, is that you may not need ANY ink!  The most challenging part may be finding something to hold the brad so that you don't burn your fingers. I used reverse tweezers and this is the perfect application for them.  


A wooden clothes pin is another option. Does anyone beside me still use clothes pins??

STEP 1.  Hold the brad while your heat it with your Heat Tool. 


STEP 2. Dip the hot brad into the embossing powder. (Just barely. You really only want the head of the brad. The prongs don't need powder, and your tweezers don't either.) Since heat melts the powder, the heat from the brad will cause the powder to start to melt onto the brad.


STEP 3. Heat the brad a little more to get a nice finish and completely melt the powder. 


I made samples with two different powders then I played with some other options. If you want to match a color, use pigment ink and clear powder. I also tested StazOn and sealed those with clear. They are still metallic, almost a bronze/copper and pewter vs. brown and black. You can color the brads (and a lot of other things!) with the Tri-Blend Markers. You can emboss these with clear too, but I don't think it's necessary.


I used white brads for the center of my flowers. You can use the Piercing Tool and the soft side of a Versamat to poke a hole in your paper for the brad. 


Please leave a comment, or any questions, below then hop over and see what Scrappin Katy has to share!

Here's the list of products I used if you need a consultant for shopping:
These Are My People paper pack
Love These People stamp set - retired
Mix In paper pack (March/April) - retired
Mink Twine
Let's Stay Home stamp set - retired    
Sapphire Shimmer Brush
Silver Brads
Bluebird Ink
White Daisy Cardstock
Carnary Cardstock
Microtip Scissors
Tombow Adhesive
Micro Glue Dots
Thin 3-D Foam Dots
Card Bases & Envelopes


Sunday, March 15, 2020

Distressed Much? CTMH Technique Blog Hop


Welcome to our blog hop for March! You may have arrived from Lauren's CTMH Craftings. To continue the Hop, just follow the links from blog to blog until you get back to where you started. If you get lost, you can find a list of participants on Melissa's page

This month's theme is ironically appropriate. We have over a dozen participants this month and I hope sharing our projects will distract and de-stress you! 

I used our new Cricut Collection, Everyday Moments, to create this card. It originally had a number of various colors, but I am getting ready for St. Patrick's Day. This design was perfect-once I changed the colors to greens and gold. 


How many shades of green do you see? Four?? Right, but I only used TWO colors of cardstock! With our two-toned solids, you get both a light and dark side for twice as many options!! The two darkest greens are the light and dark Clover. The lighter greens are light and dark Green Apple. Throwing in the Gold Glitter paper was a no brainer!


I added a little scrap of glitter paper behind the heart cut out and added a touch more bling with the Gold Glitter Gems. (These are expected to be back in stock soon! A good substitute is Golden Rod Stickles.) 


Our paper also has a white core which gives you several fun options for distressing. I sanded the outside edges of the cardstock pieces. Sometimes sanding or inking the edge of paper gets a little tricky because the paper is relatively flimsy. TIP:  Place the paper on the edge of a table to keep it stable. If your table isn't "craft friendly" (or it's curved), use the edge of the Versamat. It can be extended past the edge of the table for extra protection without losing its functionality. This is especially useful for full sheets like scrapbook pages.


You can use regular sand paper or even an emery board! The smaller shape makes those scallop edges easy!

If you don't have a CTMH consultant and want some shopping therapy, head over to my website.

The next stop on the Hop is the fabulous Miss Carrie!


Saturday, February 15, 2020

Color Your World - Technique Blog Hop


Thank you for joining us in our monthly Technique Blog Hop. For February, we're going to "Color Your World." Go from blog to blog by following the links to see all the coloring ideas we have to share. 

If you've arrived from visiting Darlys Recker, you're in the right place. If you get lost, you can find a list on Melissa's blog. 


I think when we talk about "coloring" most people have images of pencils and markers (or crayons), but there are many other ways to use color in your art that don't require "staying in between the lines." First is a technique we call paper piecing. Instead of coloring part of an image, you stamp the image twice, once on plain paper, and a second time on a print or coordinating color. Here I used the crazy lady from "You're Not Old" and cut her skirt from the plaid paper in Celebrate Today paper pack.  (Don't forget, this month during Stampaganza you can save up to 50% on stamps or stamp/thin cut bundles!)


I love that our paper packets sometime include sheets that are a piece of artwork in themselves. Here is one from the Nov/Dec Mix In pack that looks like a watercolored sky.
Mix-in Paper Packet

There are several watercolor patterns in the Celebrate Today paper pack too: one is an all-over monotone look and the other is a background sheet with several rainbow colors.


Another way to faux watercolor is with the "Strokes of an Artist" stamp set. Using a regular ink pad, you can stamp texture that looks like it was painted.
Strokes of an Artist

The Cardmaking Workshop Kit for Celebrate Today teaches a number of methods to add color without actually "coloring" in traditional ways. These include: using watercolor paints, stamp rolling, tone on tone stamping, and stamping on colored cardstock.


If your stamp is relatively symmetrical, you can use the wrong (flat) side to "color" then add the detail with the regular (bumpy) side. 


I hope this post gave you some "out of the box" ideas for coloring! Please leave a comment before hopping on to see what Lauren has to share.

Wednesday, January 15, 2020

Terrific Treats - Technique Blog Hop

Thank you for joining us in our monthly Technique Blog Hop. For January, we're spotlighting "Terrific Treats." Go from blog to blog by following the links to see all the fun ideas we have to share. Valentine's Day is only a month away!


If you've arrived from visiting Miss Carrie, you're in the right place. If you get lost, you can find a list on Melissa's blog.


Did you know...we carry products that aren't found in either of the current catalogs?!  There are two specific areas to find these on my website: Clearance and Online Only. There are so many "extra" products that the latter category is subdivided! 

Z4150
I decided to use one of these "bonus" products, Gift Card Box Thin Cut, this month for my project. Surprisingly, there aren't many ideas online using this die. Let's change that! If you have ideas, share them!  My project was so simple, I thought this post might be short. But, once I started taking pictures, I thought of all sorts of things to share!

The box die comes with two other shapes: an oval and a rectangle. These can be used to make a window in the box or to cut an additional layer for embellishing your box. But, for Valentine's, I had to use a heart! 

This is one of four sizes in the Basic Hearts Thin Cuts set. If you're making a window, the heart (or oval or rectangle or ??) can be run through your die cut machine at the same time you cut the box. If you want your window to be "closed," add a piece of acetate or vellum inside the box. You can also cut the shape from a different paper, or turn the shape over, for contrast.

For my first box, I used one of the new papers from the January/February catalog.  Celebrate Today is full of bright, cheery colors. One of the paper patterns is this fun watercolor. I used a Zip Strip around my box; it is the perfect size! What fits in these boxes? I found a few things in my treat basket that fit well including a package of Pop  Rocks (folded).


These boxes are the perfect size to pair with the cards in the Oh My Happy workshop! The envelopes included are Pixie, one of the colors in Celebrate Today. I didn't like the pink box on pink envelope, but I love the floral on pink! A little box of Red Hot candies is inside this one. Many sizes of packaged chewing gum will also fit. I suggest you take a box with you when shopping as packaging varies immensely from location to location.


I wanted to try a box with plain White Daisy cardstock. This would be an easy way to involve the kids...they could stamp or color, or color stamped images, etc. Since there are no little ones at my house, I found another way to dress up the white. I used an embossing folder and then colored the raised images with ink. (If you are looking for coloring ideas, come back next month when our theme will be "Color Your World.")


Here are the steps:

  1. Cut cardstock into 5x7 pieces.
  2. Emboss the paper.
  3. Using the Direct to Paper technique, color the raised side. (Rub the ink pad over the paper.)
  4. Use the Gift Card Box Thin Cut to cut out the shape (and window if desired).
  5. Assemble the box.
  6. Embellish.
  7. Fill.
  8. Share!!


Also note: you can get four 5x7 rectangles out of one piece of 12x12 cardstock. 

It looks like the die won't fit, but it will! Just make sure the 5" are between the outside cut edges. I cut my boxes upside down (paper on top of die) to make sure the paper was placed correctly. Also, when you make large, straight cuts, remember to angle your die so that there is a gradual leading edge going into the die cut machine. (I have a Cuttlebug.)


For this box, I used the oval AND rectangle shapes layered on top. The "to" and "from" are from the Oh My Heart stamp set CC12013. There are 37 stamps in this set!! Around this box is a piece of Candy Apple Striped Ribbon. Remember my ribbon trick from last month's blog hop? Well, if you thought it was hard to tie ribbon around a piece of paper, you won't want to try it around a paper box!  Remarkably, this box is almost the same size as the 2" x 3.5" Block. It fits inside perfectly!! If you are giving crafty gifts, this would be a fun way to wrap a block!!

Here's another tip:  To keep your ribbon from unwinding between uses, simply put a rubber band around the spool! I used to use pins, but they tended to get in the way, or misplaced. 


My favorite treat for these boxes is the Dove Promises candy! This time of year you can find the heart shapes. The regular shapes fit too, however, they are not quite square. They fit with the longer edge across the long side of the box. The specially wrapped Valentine's theme look weird to me since the letters are going in the wrong direction.  

If you don't need to make bunches of these, we found the small Dove bags at Dollar Tree.


Speaking of directions, if you use directional paper (words or lined up hearts) pay attention to which way your are cutting your box. One of the reason's I didn't use the Word Search embossing folder  (which is on Clearance!) is because I placed the die going the wrong way.

Please leave a comment before hopping over to see what aMAZing project Maz Wood is sharing this month.