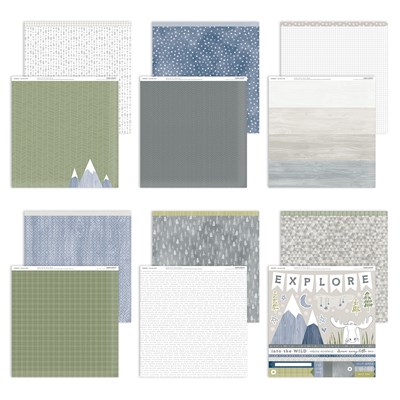
Welcome once again to our monthly Technique Blog Hop. You may have arrived from Lauren's CTMH Craftings. Be sure to check out all the post by hopping to the next blogger until you get back to where you started. I'm sure you'll be inspired by the creativity, amazed by the artwork and/or learn something new.
Sometime people have trouble with layout designs because they want to showcase more pictures than are shown on the page. I think it's faster, simpler and easier to copy a pre-designed layout design. I'd rather make fewer pages and add photos with flip flaps, pocket style memory protectors or pocket plus pages. I focus on the photo shapes and sizes and match those to the layout. With such a large variety of Memory Protectors, it's easy to add more photos, whether it's one or a dozen.
When I was laying out the pieces for these WYW pages, I realized the right side could easily be divided into 6" halves. That meant I could add a 6" x 12" flip flap, and more photos! It's like, make two pages, get one free! I used a third piece of the mountain paper cut down to 6" x 12" then I added the journaling space as directed in the instructions. I left the back 6" side as is since the arrow print was already used in this layout. The layering idea for those pictures is from last month's National Scrapbooking Month special, The World is Yours. I will also be adding a 4x4 flip flap to the bottom left square on the right page when I get the prints. And, I'm planning to have my son hand-write in the journaling space (we'll see if that actually happens). If you only have one photo to add, fill the other side of your flip flap with journaling or artwork. You can trim down a Picture My Life card to fit, or design your own.
We carry two types of 12x12 flip flaps for post-bound or D-ring albums: top load and side load. Which one you use is really a personal preference, but sometimes one is more practical for the situation. A 6x12 flip flap is "stitched" around the top, bottom and one side. Because it is stitched in the same way, I used a side-load protector. I wanted the top and bottom seams to match and I didn't want to deal with the flip flap when I inserted the 12x12 page. Flip Flap adhesive is not very forgiving, so it's a good idea to figure out your placement and then use washi tape to keep everything together while you remove the protective strip.
You can print you photos in the sizes needed for layout designs, or try NOT to zoom in too much when taking pictures. Usually, it's easy to crop the image tighter before printing. Backing up after the picture has been taken, is very hard!. I prefer to print after I select the layout, but if I already have a stack of 4x6 pictures, they can be trimmed down to smaller sizes, especially 4x4, if they haven't been "pre-cropped" by the photographer. Does your printer charge more for 4x4 than 4x6 prints? I don't know why, it's actually less, or the same, amount of paper! I even found one commonly used printer that doesn't offer 4x4 prints... Save money, back up a step or two and cut off the extra 2".
For the above layout from the Deluxe Kit, I had five vertical 4x6s that weren't easy to cut down, but I had three others that could be. Rather than pick just one of the 4x6 photos, I used flip flaps to add them all. You can stack multiple flip flaps like a book. In fact, they make great mini-albums! This time I put the flip flaps in a line for a fold-out. Tip: Attach your photos back to back before sliding them into the flip flap. Fussing with them inside the pocket is annoying.
I prefer to cut my page protectors and attach the smaller flip flaps behind the base page photo. You can read my previous post about Installing Flip Flaps for more information. I also like to add a "handle" to draw attention to the interactive element. I used some different stamps on these pages, including some from the You Are Here Cricut Cartridge Collection. These are perfect with In The Wild! To make the flip flap handle, I cut and stamped two identical pieces and attached them back to back over the flip flap using liquid glass.
A design space file is available for the Deluxe Workshop featuring Artbooking Cricut Cartridge. Tip: the triangle pages is adorable, but I had trouble with the triangle placement. I suggest a temporary adhesive to start, then you can stick them down better after they're in place. The directions recommend laying everything out, but the pieces really need to be attached so they don't shift or get brushed out of place while you're arranging them. Did you know?? If you apply our Bonding Memories glue and let it dry from blue to clear, the bond will be temporary, like a sticky note!!
What else can you do with flip flaps?
Here's a little video.
Please, leave a comment below before you hop off to see what Melissa has to share this month. She also has a list of all the participants in case you get lost going "Into the Wild."
I finished my day job early this week so I had time to play. My niece just turned 16 and my uncle will be 80 so I made them both cards (thanks to Pinterest of course). The cake card uses an old SOTM Celebrate with Cake. The balloon card featured the recently retired True Love, last year's Operation Smile set.
Here is an actual original, second one this year! I'll say it came from Divine Intervention because the saying was on a church bulletin board. I used the August stamp of the month "School Year" S1708. I wanted to show how it could be used for less school-type items. I also used some of our new Basics colors. The frame is Toffee. The stamping was done in Heather and everything was edged in Espresso. The Ruby plaid is from the Jack paper pack and the bear inside is from the Jack cardmaking and Thin Cuts set. The inside sentiment comes from one of the sets included with the Flower Market Cricut Collection.
Here are some layouts that feature the Enchantment Fundamentals and All-Star Complements. It's a good thing I am not caught up on my scrapbooking...I was able to find pictures that fit fairly well. They weren't even what I was originally thinking I would use! (This concludes my thinking out of the box for 2017.) The last picture shows the flip flaps I added to "Teamwork."
When you put a picture from a "while" ago on your social media sites.
I thought it would be fun to play along showing some past CTMH papers, kits, etc. After nearly fifteen years with Close To My Heart, I have a LOT of papers as well as the traditional throwback photos.
Sometime I have old pictures on old paper.
From the last "Big Bertha" yearly Idea Book 2004-05
Do you remember My Creations Level 1 Kits? Level one kits included pre-printed layouts and coordinating papers. The My Creations line also included a 12x12 sheet of full color die-cuts.
The colors in the Graduation kit and papers happened to be similar to my college alma mater so this was one of the few times I went back to scrapbook an event from my pre-scrapbooking years. Back then, only my memorabilia ended up in a scrapbook. Photos went in a photo. album. Isn't it great to have both in one place?
I have one remaining layout that is waiting on a photo but I want to show you this idea. Here I covered up the red in the stripes with small strips of Sunset cardstock. The red mat will also be covered so the ends don't need to be cut to size.
More color adaptations using this kit are shown below.
Sometimes I put new pictures on old paper, like this example...
From the Summer 2006 Idea Book We carried a line of kits called "My Reflections Collection" that included everything needed to make an embellished 12x12 double page layout. I loved these kits! (There's still one unused waiting on my self for the perfect photos.) There was no creativity required, just follow the directions and copy. This was very similar to our current WOTG kits. I probably made this layout nine years ago as a sample, and then it sat, waiting for someone to graduate! Either I forgot it for the first high school commencement or decided not to use it because it wasn't in the school colors. Fortunately when DS#1 and his then GF (now our DIL) received their undergrad degrees it matched perfectly! All I need to do was to print my pictures in the appropriate sizes.
This paper is only a few years old, but it is retired. Pictures from the same "new" event.
Autumn/Winter 2012 included a WOTG called Spellbound. The orange (Sunset) and black papers were perfect for graduation pictures from our local college. I mixed the Spellbound paper with pieces from the My Creations paper pack.
The bases of these pages are pre-printed layouts from My Creations Level 1 Kit. I covered the areas in the "wrong" colors with the "right" ones.
To see how I fit the Flip Flaps to size on the announcements, go here.
The die cuts were a free image of the week from Cricut. There's a new one each week! I try to pin them to my Cricut Ideas board and share on my Facebook page. These are from the Classroom-June & July cartridge. Check the offering each week and cut what you might need later.
Here are step by step directions for installing Flip Flaps™smaller than 12". You can find additional information on interactive elements in our How To Book Magic. If you missed my previous post, you can find Flipping for Flip Flaps here.
Step 1. Insert the two photos (or other items) you are using into the Flip Flap and attach it to your finished page. I like to put the adhesive under the base photo instead of on top of it. The adhesive flap folds over the opening. It is like an envelope EXCEPT the adhesive is on the opposite side of the flap, When the flap is down, the opening is covered to keep items from sliding out.
Step 2. Insert the finished layout with the Flip Flap attached into your Memory Protector. Note: Make sure you have oriented your Memory Protector correctly for the left or right hand page!!
Step 3. Mark the Memory Protector to show where to cut the slit. Mark the length of the slit as well as the stop and start points. Here I've used Washi Tape. At this point I like to remove my layouts from the Memory Protector so that I have a flap object to work with when cutting. (Note: I recommend only using Flip Flaps on only one side of your Memory Protector; it just makes this step easier.)
Step 3. Insert a small cutting mat or board inside your Memory Protector. This is IMPORTANT because otherwise you will cut into your layout and/or the back side of your page protector.
Line up your ruler with the marked edge.
Did you know our Ruler has a metal straight edge? No worrying about chipping it with the knife!
Use and X-Acto knife to cut a slit in the Memory Protector. Just to be safe, I cut from each end toward the middle. You may need to make two passes.
Step 5. Reach into your Memory Protector and bend the Flip Flaps back towards the slit. (This step is so much easier when the Flip Flaps is empty!).
I hope you can see this clearly-I put an extra piece of cardstock behind the Flip Flap. Thread the finished edge of the Flip Flap through the slit and pull it all the way through to the outside of the Memory Protector. Turn the Flip Flap to the "open" position and re-insert your items, then "close" the Flip Flap. You're done!!
This is my top/outside photo. Originally this layout ("Salsa" from Imagine) did not have a Flip Flap in this spot. The photo measurement is 3.5"x5.5" and it's matted on a 4"x6" piece. I added two 4"x6" pictures, one for the base photo (Steps 4 and 5) and one for the "inside" of the Flip Flap. The top photo was used WITH its matting to make it fit in the Flip Flap. Keep this in mind if your photo or item is smaller than our Flip Flap sizes.
Flip Flaps are amazing! This little pocket memory protectors can do so many things, you'll wonder how you ever crafted without them. Close To My Heart offers several sizes and packages.
Z4114 contains 15 of the original 4"x6" Flip Flaps
Z1325 is our 12" assortment in 4", 6" and 8" widths
Z1747 offers an assortment of the smaller sizes: 2"x2", 3"x3", 3"x4" and 4"x4"
Z3027 is the newest addition, 15 of the 3"x4" size
Flip Flaps are fun and easy to use. The most common use of Flip Flaps is to add more photos to a page. Simply design your scrapbook layout (or use one of ourHow To books), then add extra photos of the same size.
While the 12" assortment can be used for the ultimate interactive layout...
they're also good for protecting mementos you still want to access from your scrapbook.
Are you wondering if you can trim down a photo? Use your smaller size Flip Flaps as templates. Just place the Flip Flap on top and you'll be able to see which size works for you and where to trim.
Making a mini-album? Use Flip Flaps as page protectors.
My favorite use of Flip Flaps is to protect mementos that I wish to include on my scrapbook pages, and allow them to be viewed interactively.
Update 11/9/2014: Here's some more Flip Flap pictures and ideas from my Facebook Page.