Showing posts with label How To. Show all posts

Tuesday, March 14, 2023

Stash Busting 101

Are you always on the hunt for card and/or scrapbook patterns?  Would you like FREE patterns?!  How about FREE patterns WITH cutting guides?!?!

You can go to my website anytime and download the Workshop patterns and directions.  Current products have the downloads located with the product kit. You can even directions for retired kits here. If you need directions for a product not shown, just LMK.

You don't need to purchase a workshop kit in order to download the directions. If you DO purchase a kit, you can find the instructions linked in your order history.

  1. Login to my website.
  2. Click on your name and go to ACCOUNT.
  3. Click on ORDER HISTORY.
  4. Click on the page icon to the right of the order.
  5. Click on the red DOWNLOAD... line.
  6. From there you can view, save, or print the directions.
Tip:  If I'm going to use different papers, I often make a note of which is which before cutting. I may even use colored pencils to make a visual reminder. (Sometimes I color them just to keep the front and back sides more obvious.)


Here is the layout I made using the design for one of the double page spreads from It's the Little Things scrapbooking workshop kit.  I substituted almost all of the products originally used (see below for list).

You can use the designs offered by CTMH for inspiration and to bust your stash of craft supplies.  It's much easier for me to find an item that's a close substitute than to start from scratch.  You'll see in this layout that I even used word stickers, hearts, and flowers like in the original.

I used some REALLY old products on this layout!  What is the oldest CTMH item you have in your stash??


Here's a video about this layout.

CC12313 It’s the Little Things Scrapbooking Workshop Kit

        It's the Little Things Paper Packet --->  CC10203 Holiday Stack

                                           X9009 Mix In (retired)

        It's the Little Things Scrapbooking Stickers  --->  stickers from Silver & Gold Complements (retired)

        It's the Little Things Scrapbooking stamp set  --->  

                            C1800 Holly Jolly - Cardmaking (retired)

                                       CC9226 Hello Fabulous S+TC 

                            Z4240 Oh What Fun - Cardmaking S+TC (retired)

                            Z3698 Stiched Florals S+TC (retired)

        It's the Little Things Die-Cuts  --->  silver glitter die cuts from Silver & Gold Complements (retired)

        White (& Black) cardstock

        Photo Placeholders

Additional Items:

Z4189 Intense Black Stamp Pad  --->  Evergreen Stamp Pad

Z6510 Nectarine Stamp Pad  ---->  Candy Apple Stamp Pad

Z6517 Lemonade Stamp Pad  ---->  Peach Stamp Pad

Z4580 Quicksilver Metallic Paint Markers  --->  Spectrum Noir Metallic - Precious Metals (retired)

Z4634 Black & White Dots  --->  Ponderosa Pine Big Brads (retired)

Z4572 Blending Brushes

Z4606 1” Masking Tape

Z697 Round Sponge  --->  Sponge Daubers  

Z2089 Glue Dots - Micro Dots  ---> Dual-tip Permanet Glue 

Y1003 2” x 2” My Acrylix Block

Z4643 T-Square Ruler

Paper Trimmer

Scissors

Adhesive
Saturday, January 15, 2022

Let's Get Geometrical - CTMH Technique Blog Hop


Whether you arrived from Danielle's page or just stumbled upon us, WELCOME to TheScrapBuzz blog and this month's Technique Hop. For January, we are focusing on Geometric Shapes/Patterns.  Follow the links to hop from blog to blog for techniques, tips, and artwork!
 
If you get lost, find broken links or have other issues, you can find a list of all this month's participants on Melissa's page. Our group is larger this month - how exciting!!  Be sure your are commenting so the Makers know you appreciate their efforts and continue to share their projects!

I was uploading digital images to my Cricut account recently, including Geometric Circle, and thought it would perfect for our theme.

I used a pattern called Circle Collection from one of our retired How To books called Wishes. It's also similar to this card from the current seasonal catalog.

 
The circle shape reminded me of one of the the Candid Moments papers, so I used that collection for my color palette and the patterned paper. It was hard to decide if I wanted to feature the triangle or circle on my project.


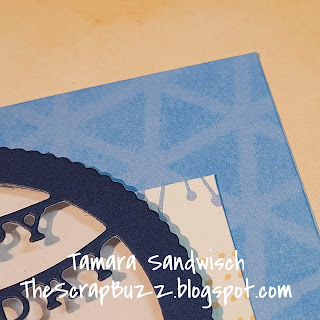
I used an extra image as a stencil and sponged onto the 5x7 card front with matching Carolina ink.


The circle made me think of shakers so I pulled out the Happy Birthday die. I was surprised that the orange Bitty Beads coordinated with the peach and papaya!  They look like sundance in my picture.

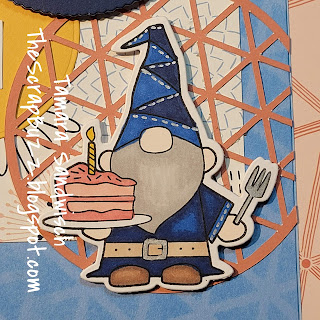
And now for some sad news:  While working on this card I discovered one of the Thin Cuts from my Party Gnomes set is missing. I know I had it several months ago. I looked for a while but it wasn't anywhere obvious. Perhaps it will show up on the bottom of an ink pad or in a pack of cardstock someday. I hope it didn't get tossed with paper scraps!!


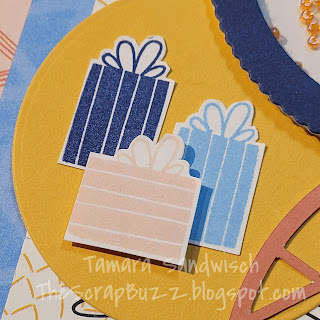
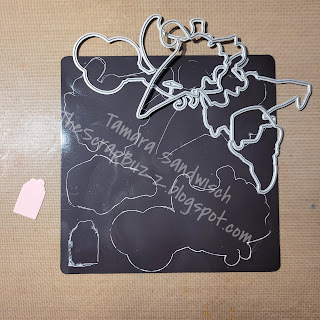
Make sure this tragedy doesn't happen to you!!  Always put your Thin Cuts back onto the magnetic sheet (included with all Thin Cuts). I usually do, so I'm not sure what could have happened, other than the gift is smaller that the other shapes.  Another tip was shared by a Maker back when we carried chalk markers, but it works with White Gel Pens too!  (We featured the pens in our hop last month.)  Simply trace around your dies so you know they're all there when you put them away.  Be sure to let the ink dry before you move your shapes. I found the 0.8 size (medium) worked best for me.


While fussy cutting the gifts, I realized I could easily make a present with the bow on a horizontal box by using a sticky note to Pick-and-Omit the stamp image.


This is the first time I used any of my Precious Metals Metallic Markers. I colored the fork and belt buckle, then added a little stitching here and there. These are definitely something I need to play with in the future!

Please scroll down and leave a comment then hop over to see what Maz has to share this month!

Sunday, August 15, 2021

Anything Goes - CTMH Technique Blog Hop


Welcome to The Scrap Buzz! For this month’s Technique Blog Hop…Anything Goes! If you’ve arrived from visiting Lauren Moore, you’re on the right track! If you get lost or find any broken links, a full list of participants is on Melissa Robinson blog.

Wander layout by TheScrapBuzz

I was having trouble coming up with a card, or smaller project, so I decided to make a Scrapbooking layout using Wander Paper Pack and Sticker Sheet. Our youngest son and his fiancé are off on another hiking/back packing adventure this weekend so there are always outdoor pictures to scrap.


The layout is Design #11 from our newest How To book, Make It From Your Heart, Volume 5. Similar to Volumes 1 and 2, this book contains designs for both layouts AND cards. The construction on Volume 5 is identical to that of Volume 3 and 4: heavy-weight, coated pages with holes so you can place it in one of our 6x8 Everyday Life albums. (Note: Volume 2 is almost sold out. I don’t know if it will be re-printed or re-published.)

The Sundance pieces at the bottom are zip strips. I used up some of my remaining stickers and also had some left-over Wander Die-Cuts to use. Did You Know…these are printed, perforated chip board pieces and the designers really did a great job filling in all the spaces with frame and shapes.

Wander layout by TheScrapBuzz.

Some of my embellishments are images that I stamped with the Take A Hike stamp set. It is also available with Thin Cuts. This is a fun outdoor themed set that I’m sure I’ll be using over and over with several paper suites! I used multiple techniques on these pieces. The paprika backpack is my attempt at copying the haphazard way the pattern paper is colored. I used a water brush and ink from the lid of my Paprika stamp pad to make a colored, oval blob on White Daisy Cardstock. Then, I stamped the backpack image on top using Black EI ink.

Wander layout by TheScrapBuzz

The blue back pack and water bottle were stamped with Sapphire EI Ink on Glacier cardstock. The green water bottle was stamped in Sage using the BACK of the stamp. This makes a solid image. Then I stamped it normally using Evergreen EI ink. This is a great way to “color” outline stamps that are left and right symmetrical, or very close. Flower stamps are fun even if they aren’t perfectly matched because you get that haphazard coloring look that this paper suite features.

I also brought in the current Mix In papers. These are truly one of my favorite products because of their versatility. Not only do they stand alone, but also coordinate with the two paper suites in the bi-monthly catalog they share. Don’t over look these from other catalogs if they are still available! And, if you see them on a flash sale, snap them up!! There are six double sided sheets per pack (12 patterns), which is a nice sample size, or grab two acts so you have two matching sheets for layouts, or one full sheet to use of each pattern.
Wander layout by TheScrapBuzz

For my title, I used a 4x6 Wander PML Card but it was too tall for the layout design…I could have adapted the page, but I adapted the card instead. I cut a piece of Peacock Cardstock the size specified in the design. Then, I trimmed the card a bit so the cardstock would show as a thin border. I love the two lines of stitching and didn’t want to just trim the PML shorter. By cutting the card where the colors change, I could layer the two pieces to make it look like one card. The white space is a good place to add the date and location for the adventure pictures that will be added.

Wander layout by TheScrapBuzz

I also did some paper piecing, by stamping the same image in several colors, then fussy cutting the images and reassembling some of the shape together for one embellishment.

Thanks for stopping by; please leave a comment below. Next, hop over to see what Katy Taylor is sharing this month.

Thursday, April 15, 2021

Dazzling Dimension - CTMH Technique Blog Hop


Welcome to The Scrap Buzz and this month's edition of the Technique Blog Hop. You have arrived from Miss Carrie's page. Keep following the links to visit all of the participants as we Show You How to add Dazzling Dimension to your projects.

When I think of dimension, I think of layers. I chose to use the Layered Flower Background Thin Cuts. These have been in my stash for a while but I hadn't gotten around to playing with them. All three dies come together.

These dies are so well designed it makes "fancy" cards Faster, Simpler, and Easier to make! The hardest thing is deciding which paper(s) to use. To select my colors, I turned to our fabulous Love of Color books. In Volume 2 I found the combination of Sangria, Peacock and Linen. In Volume 1 I found Sundance, Desert Rose, Peacock and Peach. Then I consulted the color wheel and found Sangria, Peacock and Sundance formed a triangle; they are a triadic color combination.

Do you save ridiculously small scraps??  I saved the dots and the largest leaves and made a little flower on the inside of my card. I know I tossed quite a few tiny pieces and Cricut negatives when we moved last summer, so I figured I could start a new collection! The dots might be nice in shaker cards. I used a sentiment from the Operation Smile set called Every Bit of Wonderful.


To give my card extra dimension, I cut the three layers again out of some retired paper. When assembling, I attached the two identical layers first, then attached them to the card base, bottom to top. Does it look like there is much difference? FYI I weighed my card and it is still until the 1 ounce for first class letter postage in the US.


I had to try another color combination. This time I pulled three colors from the Lovely collection: Blue Belle, Sage, and Ballerina. I cut two 4.5x12 pieces from each 12x12 sheet so I could make four cards. When cutting the bottom two layers I didn't have any trouble and was able to get both dies on the CTMH cutting mat at the same time. I did not try to cut multiple layers, just because I was mixing colors. When doing the top layer I found it worked best if I cut it alone and it needed more pressure than I usually use. I set my CTMH die cutting machine to +1 and ran it through two times. The next time I make one of these, I’ll check it after one pass. TIP:  I learned with my old Cuttlebug to place large straight dies at an angle so the transition isn’t as severe. 


Another way to use this die is to cut all the layers out of the same color. Since I cut each color with all three dies, here’s what that might look like (the layers aren’t attached). I flipped every other layer so it showcases our two-tone cardstock. For these I also added a solid layer but the other cards are built on the white card base. This might be a great way to use up old colored card bases or 8.5 x 11 cardstock!


The first card I assembled I tried one of the liquid tombow glues. I thought I would need "wiggle" room. But the CTMH Adhesive Runner worked better. Don’t forget to work on top of the All-Purpose Mat. I put the top two layers side by side and ran the adhesive along both edges at once. If you have any way-ward dots, use the Rub and Remove Eraser to remove them.


Your next stop is Melissa Robinson. She also has a list of all participants in case you get lost.


Friday, May 15, 2020

Stencil It! CTMH Technique Blog Hop


Welcome to our May blog hop! You've come from the blog of Hayley Dyer. To continue the Hop, just follow the links from blog to blog until you get back to where you started. If you get lost, you can find a list of participants on Melissa's page. This month we are highlighting stencils. That may sound old school to you, but I'm sure you'll find new ideas for personalizing your art work! Before showing you my project, I have an announcement to make:

...And the award for the Official stamp set of the Pacific Northwest 
goes to..."Make a Splash!!" {Applause}

Make a Splash
I knew I needed this set as soon as I saw it in the May/June catalog. It is pretty adorable even if you don't live in a rain forest. Don't you think?? Plus the sayings are appropriate for almost anyone, anytime and I was surprised by how perfect the set is for these crazy pandemic times. If you need more rainy weather stamps, check out "When Skies Are Grey."

I wanted to showcase this set and was also inspired by the Blue Skies cardstock, part of May's special for National Scrapbooking Month. I love the UV coating and wanted to make something similar. 

Can you see the raindrops? 
This card pattern is #7 in Make It From Your Heart Volume #4. I always think rain boots are yellow; too much Curious George as a child I guess! I paired it with one of the papers in Stitched Together. Do you see anything stitched or quilt-related in this design? That's what I love about our B&T Duos and paper packs: any pattern that highly themed is usually universal on the reverse side. Can you see the upside-down raindrops on this paper?? I think they're supposed to be flower petals. That would be something else I could do with my stencil!


Here's how I made my card:  The rain drops are from an overlay image in the Cricut Artistry Collection.  In Design Space, I added the image then used [Contour] to hide the outer line of the image; this gave me just drops to cut out. I used [Duplicate] to copy the image, next I used [Contour] again to "remove" a few drops at the bottom. I made a copy of the edited image with [Duplicate]. Now I had three images, the original, and two edited copies. I lined these up by utilizing the [Position] coordinates. Finally, all three images were "connected" with [Attach] to cut as one item. When cutting the stencil, I made sure to move it over so that there was at least 1" around all three sides when finished.

Before putting the raindrops on my paper, I stamped the two sentiments in Sapphire ink. I rubbed the Anti-Static pouch over this piece and then tacked it in place on a piece of desk pad paper. The stencil was positioned over the cardstock. The drops are fewer near the bottom so I kept away from "splash" but went right over the sentiment at the top. I used the VersaMark pad right on the stencil. After removing the stencil, I used clear embossing powder and embossed as usual. 


Note: Your stencil will be sticky from the VersaMark ink. I first tried cleaning it off with Spritz and a rag.That wasn't bad, but I had so many layers from experimenting, it wasn't quite enough. On my way to the sink, I passed some baby wipes. The wipes worked, at least with my pre-wash. I wouldn't use the chemical disinfectant wipes everyone is hoarding right now, but alcohol-free, mild baby wipes may work. Otherwise, go with my first thought, clean it with a mild soap and water.


To make the puddle at the bottom, I grabbed my Mint Shimmer Brush.


Inside, is another boot, this time stamped with Mink instead of Black so the image is defined, but not overwhelming the sentiment. These could have been stamped right on the card base, but I wanted the flowers to be a separate piece so that the marker didn't show through the back. 


Now, I would never have fussy cut these flowers out of the paper. Even cutting out the boots would have been pushing it, and those are a much simpler design. But with Thin Cuts, it was no problem! It's one of the main reason I bought this stamp set, I can use these flowers for many other projects. The flowers are colored with Tri-Blend markers. 
*I've since decided that Green Turquoise (light end) is a better match for Mint. I'd call the Dull Green colors > Green Apple (light), Sage, and New England Ivy (light). For Sweet Leaf I like Citrus Green (light end). Those of us in the matchy-matchy OCD world can get really freaked out about color matching! But, the truth is, on these tiny images, none of which are even shown with the patterned paper, it doesn't matter (too much!).

Please leave some love in the comment section below!


Thanks for stopping by!! Next, head over to see what fabulous-ness Maz Wood has for you this month.

🛒🛒Ready to shop? Head to my website to find the products I used:

  • Make a Splash stamp set (available with or without Thin Cuts)
  • Stitched Together paper pack (available with or without sticker sheet)
  • Lemonade Cardstock
  • White Daisy Cardstock
  • Mint Shimmer Brush
  • Intense Black ink pad
  • Sapphire ink pad
  • Mink ink pad
  • Tri-Blend markers (see colors above)
  • VersaMark pad
  • Anti-Static Pouch
  • Clear Super Fine embossing powder
  • Heat Tool
  • Stencil Sheets
  • Card Bases and Envelopes value pack
  • Artistry Cricut Collection (use this link to shop Cricut)


Wednesday, April 15, 2020

Heat It Up! Technique Blog Hop


Welcome to our April blog hop! You may have arrived from visiting Miss Carrie. To continue the Hop, just follow the links from blog to blog until you get back to where you started. If you get lost, you can find a list of participants on Melissa's page. 

Spring has sprung and around here, we haven't even had the April showers yet, so as the weather warms, let's Heat It Up! with some heat embossing!

 I made this card with the new "Let's Stay Home" stamp set Close To My Heart has created for documenting the Covid-19 pandemic. Many of us are embracing the idea to "Stay Home and Create!" I've been sending extra cards to keep in touch with family and friends and I have an online crop starting April 15 (contact me for more info).


I also used the current Mix In paper pack and both the stamp set and paper from our "These Are My People" special. The patterns is #6 from Volume 4 in our How To series Make It From Your Heart.

Have you noticed that brads are back in our product line?? You'll need them for making spinner cards and some adorable new things coming in May. Right now, silver is the only option, but what if you want to use them in another color for artwork? Did you know...you can color brads with heat embossing?! Let Me Show You How...

One of the amazing things about embossing brads, is that you may not need ANY ink!  The most challenging part may be finding something to hold the brad so that you don't burn your fingers. I used reverse tweezers and this is the perfect application for them.  


A wooden clothes pin is another option. Does anyone beside me still use clothes pins??

STEP 1.  Hold the brad while your heat it with your Heat Tool. 


STEP 2. Dip the hot brad into the embossing powder. (Just barely. You really only want the head of the brad. The prongs don't need powder, and your tweezers don't either.) Since heat melts the powder, the heat from the brad will cause the powder to start to melt onto the brad.


STEP 3. Heat the brad a little more to get a nice finish and completely melt the powder. 


I made samples with two different powders then I played with some other options. If you want to match a color, use pigment ink and clear powder. I also tested StazOn and sealed those with clear. They are still metallic, almost a bronze/copper and pewter vs. brown and black. You can color the brads (and a lot of other things!) with the Tri-Blend Markers. You can emboss these with clear too, but I don't think it's necessary.


I used white brads for the center of my flowers. You can use the Piercing Tool and the soft side of a Versamat to poke a hole in your paper for the brad. 


Please leave a comment, or any questions, below then hop over and see what Scrappin Katy has to share!

Here's the list of products I used if you need a consultant for shopping:
These Are My People paper pack
Love These People stamp set - retired
Mix In paper pack (March/April) - retired
Mink Twine
Let's Stay Home stamp set - retired    
Sapphire Shimmer Brush
Silver Brads
Bluebird Ink
White Daisy Cardstock
Carnary Cardstock
Microtip Scissors
Tombow Adhesive
Micro Glue Dots
Thin 3-D Foam Dots
Card Bases & Envelopes