 Welcome once again to our monthly Technique Blog Hop. You may have arrived from Lauren's CTMH Craftings. Be sure to check out all the post by hopping to the next blogger until you get back to where you started. I'm sure you'll be inspired by the creativity, amazed by the artwork and/or learn something new.
I'm using Into the Wild paper to scrap the outdoor adventures of our youngest son and his girl friend. This month I'm showing layouts from both the Workshop Your Way and Deluxe Scrapbooking Kit.
 Sometime people have trouble with layout designs because they want to showcase more pictures than are shown on the page. I think it's faster, simpler and easier to copy a pre-designed layout design. I'd rather make fewer pages and add photos with flip flaps, pocket style memory protectors or pocket plus pages. I focus on the photo shapes and sizes and match those to the layout. With such a large variety of Memory Protectors, it's easy to add more photos, whether it's one or a dozen.
 We carry two types of 12x12 flip flaps for post-bound or D-ring albums: top load and side load. Which one you use is really a personal preference, but sometimes one is more practical for the situation. A 6x12 flip flap is "stitched" around the top, bottom and one side. Because it is stitched in the same way, I used a side-load protector. I wanted the top and bottom seams to match and I didn't want to deal with the flip flap when I inserted the 12x12 page. Flip Flap adhesive is not very forgiving, so it's a good idea to figure out your placement and then use washi tape to keep everything together while you remove the protective strip.
 You can print you photos in the sizes needed for layout designs, or try NOT to zoom in too much when taking pictures. Usually, it's easy to crop the image tighter before printing. Backing up after the picture has been taken, is very hard!. I prefer to print after I select the layout, but if I already have a stack of 4x6 pictures, they can be trimmed down to smaller sizes, especially 4x4, if they haven't been "pre-cropped" by the photographer. Does your printer charge more for 4x4 than 4x6 prints? I don't know why, it's actually less, or the same, amount of paper! I even found one commonly used printer that doesn't offer 4x4 prints... Save money, back up a step or two and cut off the extra 2".
For the above layout from the Deluxe Kit, I had five vertical 4x6s that weren't easy to cut down, but I had three others that could be. Rather than pick just one of the 4x6 photos, I used flip flaps to add them all. You can stack multiple flip flaps like a book. In fact, they make great mini-albums! This time I put the flip flaps in a line for a fold-out.

 Tip: Attach your photos back to back before sliding them into the flip flap. Fussing with them inside the pocket is annoying.
 I prefer to cut my page protectors and attach the smaller flip flaps behind the base page photo. You can read my previous post about Installing Flip Flaps for more information. I also like to add a "handle" to draw attention to the interactive element. I used some different stamps on these pages, including some from the You Are Here Cricut Cartridge Collection. These are perfect with In The Wild! To make the flip flap handle, I cut and stamped two identical pieces and attached them back to back over the flip flap using liquid glass.
 A design space file is available for the Deluxe Workshop featuring Artbooking Cricut Cartridge. Tip: the triangle pages is adorable, but I had trouble with the triangle placement. I suggest a temporary adhesive to start, then you can stick them down better after they're in place. The directions recommend laying everything out, but the pieces really need to be attached so they don't shift or get brushed out of place while you're arranging them. Did you know?? If you apply our Bonding Memories glue and let it dry from blue to clear, the bond will be temporary, like a sticky note!!
What else can you do with flip flaps?
Here's a little video.
Please, leave a comment below before you hop off to see what Melissa has to share this month. She also has a list of all the participants in case you get lost going "Into the Wild."
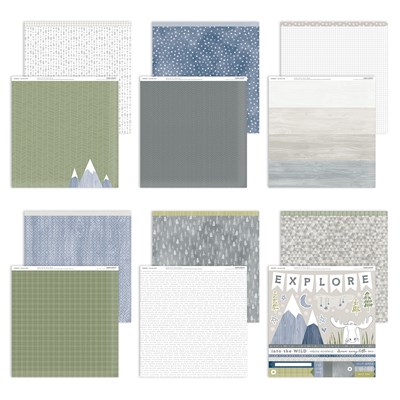 Ready to shop? Here are the products I used:
Into the Wild Workshop Your Way Scrapbooking Kit
Into the Wild Deluxe Scrapbooking Kit (w/o stamp)
Z679 Liquid Glass
Z4089 Liquid Glass Fine Tip Applicator
Z3268 Flip Flaps Memory Protectors 6" x 12"
Z3231 Flip Flaps Memory Protectors 4" x 6"
Z1977 Memory Protectors Side Load Value Pack
Z3503 Cricut Artbooking Digital Collection
Z3502 Cricut You Are Here Digital Collection


