
Showing posts with label 2022. Show all posts
Showing posts with label 2022. Show all posts
Thursday, December 1, 2022


Monday, March 28, 2022
Project Ideas for National Scrapbooking Day Event
Join me on Saturday, May 7 to celebrate National Scrapbooking Day! If you select the All-Day crop option and are ISO a project (or two or three), I have suggestions!!
Here are links to the products/projects in the video:
- Best Friends Furever Cut Above (6" x 8") Kit

Happiest Place (8.5" x 11") mini album kit

This kit makes 13, single page 12" x 12" pages.
Add the Base Calendar if desired.

This kit makes 13, single page 12" x 12" pages.
Add the Base Calendar if desired.

- Make It From Your Heart subscription
Any/All of the official NSDay project kits.
Any currently available Card or Scrapbooking Workshop Kits (GXXXX). Shop early for best selection!
Exclusive VIP Highlights kit.
April Album Retreat (order by April 2)
any Story by Stacy mini album kit
Home Sweet Home frame kit
More ideas coming!


Tuesday, February 15, 2022
Stunning Stencils - CTMH Technique Blog Hop

Whether you arrived from CatScrapbooking or just stumbled upon us, WELCOME to TheScrapBuzz blog and this month's Technique Hop. We are using stencils for February; there are several new ones in the Core Catalog. Follow the links to hop from blog to blog for techniques, tips, and artwork!
If you get lost, find broken links or have other issues, you can find a list of all this month's participants on Melissa's page. We have over a dozen CTMH Makers participating this time! Be sure you are commenting so they know you appreciate their efforts and continue to share their projects!
I spend several days of quality time with one of three new Card Front Stencils, Pack #3.

Did you see this post on the Make It From Your Heart blog? I was having trouble with the diagonal stencil until I watched this video from that post. One thing I'll suggest is when you are sponging with our Exclusive Inks, is to use the corners of the stamp pad. We usually ink stamps in the middle of the pad. Whenever I use small stamps, or sponges, I try to use the corners. As you'll see in Karen's video, press the sponge into the pad to absorb in, then pounce the sponge when the stencil wants to "wiggle."
I made my own background paper with the diagonal lines then featured it with Pattern #18, from Volume #4 of Make It From Your Heart.

In between the lines, I stamped the little bee from the Sweet As Honey - Cardmaking stamp set.

After you leave a comment, hop over to see what Wendy has created this time. Thank you for stopping by!
Products Used:
Cardstock: Black, Shortbread, Sundance, Mink


Exclusive Inks: Black, Sundance
Sweet as Honey paper pack


Saturday, January 15, 2022
Let's Get Geometrical - CTMH Technique Blog Hop

Whether you arrived from Danielle's page or just stumbled upon us, WELCOME to TheScrapBuzz blog and this month's Technique Hop. For January, we are focusing on Geometric Shapes/Patterns. Follow the links to hop from blog to blog for techniques, tips, and artwork!
If you get lost, find broken links or have other issues, you can find a list of all this month's participants on Melissa's page. Our group is larger this month - how exciting!! Be sure your are commenting so the Makers know you appreciate their efforts and continue to share their projects!
I was uploading digital images to my Cricut account recently, including Geometric Circle, and thought it would perfect for our theme.

I used a pattern called Circle Collection from one of our retired How To books called Wishes. It's also similar to this card from the current seasonal catalog.
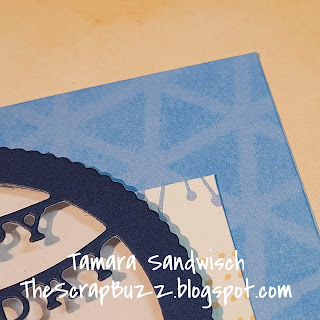
The circle shape reminded me of one of the the Candid Moments papers, so I used that collection for my color palette and the patterned paper. It was hard to decide if I wanted to feature the triangle or circle on my project.

I used an extra image as a stencil and sponged onto the 5x7 card front with matching Carolina ink.
The circle made me think of shakers so I pulled out the Happy Birthday die. I was surprised that the orange Bitty Beads coordinated with the peach and papaya! They look like sundance in my picture.
And now for some sad news: While working on this card I discovered one of the Thin Cuts from my Party Gnomes set is missing. I know I had it several months ago. I looked for a while but it wasn't anywhere obvious. Perhaps it will show up on the bottom of an ink pad or in a pack of cardstock someday. I hope it didn't get tossed with paper scraps!!
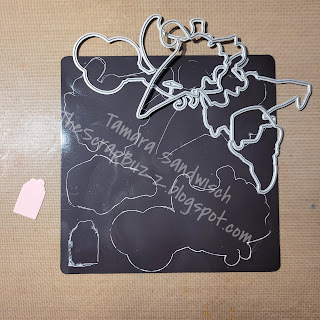
Make sure this tragedy doesn't happen to you!! Always put your Thin Cuts back onto the magnetic sheet (included with all Thin Cuts). I usually do, so I'm not sure what could have happened, other than the gift is smaller that the other shapes. Another tip was shared by a Maker back when we carried chalk markers, but it works with White Gel Pens too! (We featured the pens in our hop last month.) Simply trace around your dies so you know they're all there when you put them away. Be sure to let the ink dry before you move your shapes. I found the 0.8 size (medium) worked best for me.
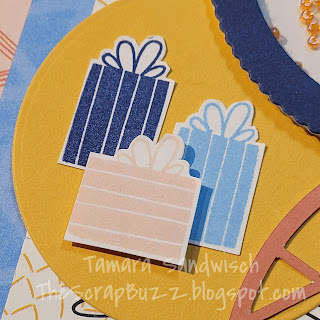
While fussy cutting the gifts, I realized I could easily make a present with the bow on a horizontal box by using a sticky note to Pick-and-Omit the stamp image.
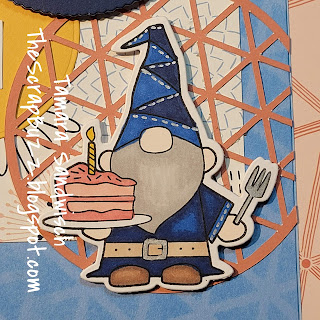
This is the first time I used any of my Precious Metals Metallic Markers. I colored the fork and belt buckle, then added a little stitching here and there. These are definitely something I need to play with in the future!
PRODUCTS USED

Spectrum Noir TriBlend Marker Colors: Fair Skin, Coral, True Blue, Brown Grey, Red Brown, Gold Yellow

Precious Metals Metallic Markers


Subscribe to:
Posts (Atom)