Showing posts with label CTMH. Show all posts

Saturday, July 6, 2024

July 6, 2024

Are you looking for new products?  TWO new kits are released by Stampin' Up! every month.  Find all the kits HERE.

If you're interested in the Stampin' Up vs Close To My Heart catalog schedule, this post is for you!

There are still NEW products every two months, but not everything is printed in a catalog. 


New online exclusive products were just released, in addition to the final collection of #CTMH branded items. Use THIS LINK to reach the Close To My Heart branded items. The exclusive online items can be found HERE.

I will be sending out mini-catalogs soon! This publication will be valid September-December.  Make sure you have your Stampin' Up! login set up with me to be on the mailing list.


Tuesday, March 14, 2023

Stash Busting 101

Are you always on the hunt for card and/or scrapbook patterns?  Would you like FREE patterns?!  How about FREE patterns WITH cutting guides?!?!

You can go to my website anytime and download the Workshop patterns and directions.  Current products have the downloads located with the product kit. You can even directions for retired kits here. If you need directions for a product not shown, just LMK.

You don't need to purchase a workshop kit in order to download the directions. If you DO purchase a kit, you can find the instructions linked in your order history.

  1. Login to my website.
  2. Click on your name and go to ACCOUNT.
  3. Click on ORDER HISTORY.
  4. Click on the page icon to the right of the order.
  5. Click on the red DOWNLOAD... line.
  6. From there you can view, save, or print the directions.
Tip:  If I'm going to use different papers, I often make a note of which is which before cutting. I may even use colored pencils to make a visual reminder. (Sometimes I color them just to keep the front and back sides more obvious.)


Here is the layout I made using the design for one of the double page spreads from It's the Little Things scrapbooking workshop kit.  I substituted almost all of the products originally used (see below for list).

You can use the designs offered by CTMH for inspiration and to bust your stash of craft supplies.  It's much easier for me to find an item that's a close substitute than to start from scratch.  You'll see in this layout that I even used word stickers, hearts, and flowers like in the original.

I used some REALLY old products on this layout!  What is the oldest CTMH item you have in your stash??


Here's a video about this layout.

CC12313 It’s the Little Things Scrapbooking Workshop Kit

        It's the Little Things Paper Packet --->  CC10203 Holiday Stack

                                           X9009 Mix In (retired)

        It's the Little Things Scrapbooking Stickers  --->  stickers from Silver & Gold Complements (retired)

        It's the Little Things Scrapbooking stamp set  --->  

                            C1800 Holly Jolly - Cardmaking (retired)

                                       CC9226 Hello Fabulous S+TC 

                            Z4240 Oh What Fun - Cardmaking S+TC (retired)

                            Z3698 Stiched Florals S+TC (retired)

        It's the Little Things Die-Cuts  --->  silver glitter die cuts from Silver & Gold Complements (retired)

        White (& Black) cardstock

        Photo Placeholders

Additional Items:

Z4189 Intense Black Stamp Pad  --->  Evergreen Stamp Pad

Z6510 Nectarine Stamp Pad  ---->  Candy Apple Stamp Pad

Z6517 Lemonade Stamp Pad  ---->  Peach Stamp Pad

Z4580 Quicksilver Metallic Paint Markers  --->  Spectrum Noir Metallic - Precious Metals (retired)

Z4634 Black & White Dots  --->  Ponderosa Pine Big Brads (retired)

Z4572 Blending Brushes

Z4606 1” Masking Tape

Z697 Round Sponge  --->  Sponge Daubers  

Z2089 Glue Dots - Micro Dots  ---> Dual-tip Permanet Glue 

Y1003 2” x 2” My Acrylix Block

Z4643 T-Square Ruler

Paper Trimmer

Scissors

Adhesive

Monday, November 15, 2021

Silver & Gold Technique Blog Hop

Welcome to The Scrap Buzz and this month's edition of the Technique Blog Hop. You have arrived from visiting Judy. Keep following the links to visit all of the participants. If you get lost, a Colette list can be found on Melissa’s page. This month we are featuring Silver & Gold.

This month, I put a little TECH in the technique hop. My project is not paper, it's fabric and vinyl! DID YOU KNOW Close To My Heart offers heat transfer vinyl (HTV)? It can be found under Specialty Paper (although it's not paper). You can do things with vinyl that can also be done with paper, including cutting it with a Cricut, Silhouette, etc. HTV can be used for things where paper wouldn't work or be permanent such as, to decorate the front of scrapbook albums, personalize items, and MAKE SHIRTS! 

In addition to our Cricut Collections and other Cricut images, you can also upload other types of images to Design Space. DID YOU KNOW, Close To My Heart offers digital art in the form of SVGs? 

What is an SVG file? An SVG file, short for scalable vector graphic file, is a standard graphics file type used for rendering two-dimensional images on the internet.

To me, that translates as, “works with electronic cutting machines!”  You can find the images offered on your makers website by going to SHOP, then to the Digital Art category. Individual images are only $1, plus there’s no shipping! I used the Craft Queen image for my shirt and cut it from our Silver Glitter HTV. (Note:  I pre-washed my shirt.) In case you missed it, the coordinating die cut for the paper suites are now SVG (instead of specifically Cricut images), so they're now more usable to more people!

Sometimes a special promotion will include an SVG, such as the new Merry Making ornaments. Once you purchase an ornament product, the SVG files are added to your digital library automatically. You can have your glitter paper cut and ready to adhere to the ornaments as soon as they arrive!! I've heard a lot of questions about where to find Digital Art after purchase.  Access your digital library from your Maker's website by clicking on your name to open the drop down menu. From there, click on account. On the left side, (or new drop down menu), select Digital Library. All of your purchased images will be here. Click on the blue download icon to add them to your device.

The next question is always "How to do I upload Digital Art to Cricut Design Space?" Here's a step-by-step:

  1. Open the Cricut App on your PC [or Apple device]. Start a NEW PROJECT.
  2. Click on UPLOAD.
  3. UPLOAD IMAGE with Drag & Drop or [BROWSE FILES] and select your downloaded image.
  4. You may with to give your image a name (and tag with keywords). Click UPLOAD [SAVE].
  5. Your new image will now show under Recent Uploads [Images]. Click on it and ADD TO CANVAS [INSERT].
  6. Next time you want to use this image, click on UPLOAD, then look for it under Recent Uploads, or View All [Open Uploaded Images]. You can also search for it with one of your keywords. 
  7. Resize your image as desired.
  8. MAKE IT.
  9. If the preview looks like all of the parts of your images are being cut separately, and not spaced correctly, CANCEL to go back to the [CANVAS], then select the entire image, and [ACTION] ATTACH. Continue with MAKE IT. (Note:  this is for single color images. For layered images, each color needs to be attached separately.)
  10. For HTV, be sure to MIRROR [on CANVAS, EDIT, HORIZONTAL] the image so that it's backwards.
  11. Put vinyl shiny side down on your mat. 
  12. Use Vinyl setting on your machine. CONTINUE and cut image.
  13. Weed the vinyl.
  14. Follow Easy Press/iron instructions. Here is an online Heat Guide and a printable version.  For CTMH's vinyl FAQ sheet, click here.
  15. Pre-heat Easy Press/iron.
  16. Make sure there are no wrinkles in fabric, or other item is flat and stable.
  17. Pre-heat the base item to which you are adding the vinyl.
  18. Lay Vinyl on your base, shiny side up this time (so you can read it), check placement.
  19. Heat the vinyl as directed. 
  20. Heat the image from the backside of a shirt too.  This isn't necessary on an album.
  21. Check adhesion. Reheat for a few seconds if needed.
  22. Remove plastic backing when directed (hot or cold).

Think of all the fun crafts you can make for the holidays using HTV:  matching family shirts, monogrammed napkins, personalized gifts, and of course, albums! 

A few years ago, I made this video to show how to put vinyl on an album. The vinyl image shown in the video is from  These Are My People kit.

I have been asked to do a live video showing how to size images in Cricut for items like the Merry Making ornaments, so watch my Facebook page for that!  I think it will be a Zoom video because I think I can do the screen share thing! (We'll find out.)

 Before you go on to see what Katy is sharing, please leave a comment. If you do not have a Maker, let me know how I can help, and check out my website.


Sunday, November 1, 2020

Here's the deal...

How does the Stamp of the Month program work?


Every month there is an exclusive D-size stamp set that is available to purchase ONLY during its featured month. There are never any "left overs" that you might see like after a seasonal idea book retires. They don't show up in the clearance section. If you want that stamp set, it must be purchased between the 1st and last day of the month in which it is offered.

The retail price of a D-size stamp set is $18.95. It is always available to anyone at full price; but, HERE'S THE DEAL:

When your retail total is $50 or higher, you can purchase the SOTM for only $5!!

That's pretty good! Do you want better?? VIP Customers can get the SOTM for FREE when their total is $50 or more. The best news is that VIP customers can get this deal EVERY month!! That's over a 25% savings (on a $50 order) BEFORE any other VIP perks. 

Want two? If you want a second SOTM for a friend, or to have double the letters of an alphabet, etc., additional sets are $5 each for every additional $50 retail spent.

Saturday, October 10, 2020

Adding a little more CRAZY to 2020

 Because a world-wide pandemic wasn't enough excitement this year, we decided to move across the country. Greetings from Northwest Ohio! We are here, but I wouldn't say we're settled. Almost ever thing is still packed, we're staying with family, both Oregon properties are sold and the Ohio flip is on the market. We're starting our due diligence on a distressed property, nothing like the flip, but it would still scare normal buyers. We'll see how it goes. 

What does everyone think of the new 2020-21 Core and Seasonal Sept/Oct Catalogs?!?!

I can think of several people who should be excited about all the mixed media items. I like all the paper suites and am IN LOVE with our Color of the Year Blue Belle!!


The other new colors are:

  • Desert Rose
  • Cinnamon
  • Scarlet
  • Flamingo
  • Grape
  • Avocado (which I can now spell correctly)
  • Sundance
Way before anyone knew about Covid, the CTMH Corporate Office was planning some exciting changes that took place on October 1. If you haven't checked out the new VIP Customer program, click the tab above. I think this is going to be perfect since Home Parties have been few and far between in general. Now that we're all 6 feet (or 2000 miles) apart, it's even more appropriate. Did you catch my new title? Consultant are now called Makers! I'm still consulting independently and running my business the way I want to, but the new name is kind of fun. Now, if I can only get somethings made!!

Share your crafty projects on my Facebook page! I need your creativity and inspiration. I have not been able to do much making but am going to break out my Craft with Heart Card Subscription ASAP. This is perfect for my life right now: everything is in the box and all I needed to find (which I did) was adhesive. 

I'm looking forward to getting together with you virtually and scheduled a Christmas Card class for October 24. See the details under Events to Join.

Friday, May 15, 2020

Stencil It! CTMH Technique Blog Hop


Welcome to our May blog hop! You've come from the blog of Hayley Dyer. To continue the Hop, just follow the links from blog to blog until you get back to where you started. If you get lost, you can find a list of participants on Melissa's page. This month we are highlighting stencils. That may sound old school to you, but I'm sure you'll find new ideas for personalizing your art work! Before showing you my project, I have an announcement to make:

...And the award for the Official stamp set of the Pacific Northwest 
goes to..."Make a Splash!!" {Applause}

Make a Splash
I knew I needed this set as soon as I saw it in the May/June catalog. It is pretty adorable even if you don't live in a rain forest. Don't you think?? Plus the sayings are appropriate for almost anyone, anytime and I was surprised by how perfect the set is for these crazy pandemic times. If you need more rainy weather stamps, check out "When Skies Are Grey."

I wanted to showcase this set and was also inspired by the Blue Skies cardstock, part of May's special for National Scrapbooking Month. I love the UV coating and wanted to make something similar. 

Can you see the raindrops? 
This card pattern is #7 in Make It From Your Heart Volume #4. I always think rain boots are yellow; too much Curious George as a child I guess! I paired it with one of the papers in Stitched Together. Do you see anything stitched or quilt-related in this design? That's what I love about our B&T Duos and paper packs: any pattern that highly themed is usually universal on the reverse side. Can you see the upside-down raindrops on this paper?? I think they're supposed to be flower petals. That would be something else I could do with my stencil!


Here's how I made my card:  The rain drops are from an overlay image in the Cricut Artistry Collection.  In Design Space, I added the image then used [Contour] to hide the outer line of the image; this gave me just drops to cut out. I used [Duplicate] to copy the image, next I used [Contour] again to "remove" a few drops at the bottom. I made a copy of the edited image with [Duplicate]. Now I had three images, the original, and two edited copies. I lined these up by utilizing the [Position] coordinates. Finally, all three images were "connected" with [Attach] to cut as one item. When cutting the stencil, I made sure to move it over so that there was at least 1" around all three sides when finished.

Before putting the raindrops on my paper, I stamped the two sentiments in Sapphire ink. I rubbed the Anti-Static pouch over this piece and then tacked it in place on a piece of desk pad paper. The stencil was positioned over the cardstock. The drops are fewer near the bottom so I kept away from "splash" but went right over the sentiment at the top. I used the VersaMark pad right on the stencil. After removing the stencil, I used clear embossing powder and embossed as usual. 


Note: Your stencil will be sticky from the VersaMark ink. I first tried cleaning it off with Spritz and a rag.That wasn't bad, but I had so many layers from experimenting, it wasn't quite enough. On my way to the sink, I passed some baby wipes. The wipes worked, at least with my pre-wash. I wouldn't use the chemical disinfectant wipes everyone is hoarding right now, but alcohol-free, mild baby wipes may work. Otherwise, go with my first thought, clean it with a mild soap and water.


To make the puddle at the bottom, I grabbed my Mint Shimmer Brush.


Inside, is another boot, this time stamped with Mink instead of Black so the image is defined, but not overwhelming the sentiment. These could have been stamped right on the card base, but I wanted the flowers to be a separate piece so that the marker didn't show through the back. 


Now, I would never have fussy cut these flowers out of the paper. Even cutting out the boots would have been pushing it, and those are a much simpler design. But with Thin Cuts, it was no problem! It's one of the main reason I bought this stamp set, I can use these flowers for many other projects. The flowers are colored with Tri-Blend markers. 
*I've since decided that Green Turquoise (light end) is a better match for Mint. I'd call the Dull Green colors > Green Apple (light), Sage, and New England Ivy (light). For Sweet Leaf I like Citrus Green (light end). Those of us in the matchy-matchy OCD world can get really freaked out about color matching! But, the truth is, on these tiny images, none of which are even shown with the patterned paper, it doesn't matter (too much!).

Please leave some love in the comment section below!


Thanks for stopping by!! Next, head over to see what fabulous-ness Maz Wood has for you this month.

🛒🛒Ready to shop? Head to my website to find the products I used:

  • Make a Splash stamp set (available with or without Thin Cuts)
  • Stitched Together paper pack (available with or without sticker sheet)
  • Lemonade Cardstock
  • White Daisy Cardstock
  • Mint Shimmer Brush
  • Intense Black ink pad
  • Sapphire ink pad
  • Mink ink pad
  • Tri-Blend markers (see colors above)
  • VersaMark pad
  • Anti-Static Pouch
  • Clear Super Fine embossing powder
  • Heat Tool
  • Stencil Sheets
  • Card Bases and Envelopes value pack
  • Artistry Cricut Collection (use this link to shop Cricut)


Sunday, March 15, 2020

Distressed Much? CTMH Technique Blog Hop


Welcome to our blog hop for March! You may have arrived from Lauren's CTMH Craftings. To continue the Hop, just follow the links from blog to blog until you get back to where you started. If you get lost, you can find a list of participants on Melissa's page. 

This month's theme is ironically appropriate. We have over a dozen participants this month and I hope sharing our projects will distract and de-stress you! 

I used our new Cricut Collection, Everyday Moments, to create this card. It originally had a number of various colors, but I am getting ready for St. Patrick's Day. This design was perfect-once I changed the colors to greens and gold. 


How many shades of green do you see? Four?? Right, but I only used TWO colors of cardstock! With our two-toned solids, you get both a light and dark side for twice as many options!! The two darkest greens are the light and dark Clover. The lighter greens are light and dark Green Apple. Throwing in the Gold Glitter paper was a no brainer!


I added a little scrap of glitter paper behind the heart cut out and added a touch more bling with the Gold Glitter Gems. (These are expected to be back in stock soon! A good substitute is Golden Rod Stickles.) 


Our paper also has a white core which gives you several fun options for distressing. I sanded the outside edges of the cardstock pieces. Sometimes sanding or inking the edge of paper gets a little tricky because the paper is relatively flimsy. TIP:  Place the paper on the edge of a table to keep it stable. If your table isn't "craft friendly" (or it's curved), use the edge of the Versamat. It can be extended past the edge of the table for extra protection without losing its functionality. This is especially useful for full sheets like scrapbook pages.


You can use regular sand paper or even an emery board! The smaller shape makes those scallop edges easy!

If you don't have a CTMH consultant and want some shopping therapy, head over to my website.

The next stop on the Hop is the fabulous Miss Carrie!


Saturday, February 15, 2020

Color Your World - Technique Blog Hop


Thank you for joining us in our monthly Technique Blog Hop. For February, we're going to "Color Your World." Go from blog to blog by following the links to see all the coloring ideas we have to share. 
If you've arrived from visiting Darlys Recker, you're in the right place. If you get lost, you can find a list on Melissa's blog. 


I think when we talk about "coloring" most people have images of pencils and markers (or crayons), but there are many other ways to use color in your art that don't require "staying in between the lines." First is a technique we call paper piecing. Instead of coloring part of an image, you stamp the image twice, once on plain paper, and a second time on a print or coordinating color. Here I used the crazy lady from "You're Not Old" and cut her skirt from the plaid paper in Celebrate Today paper pack.  (Don't forget, this month during Stampaganza you can save up to 50% on stamps or stamp/thin cut bundles!)


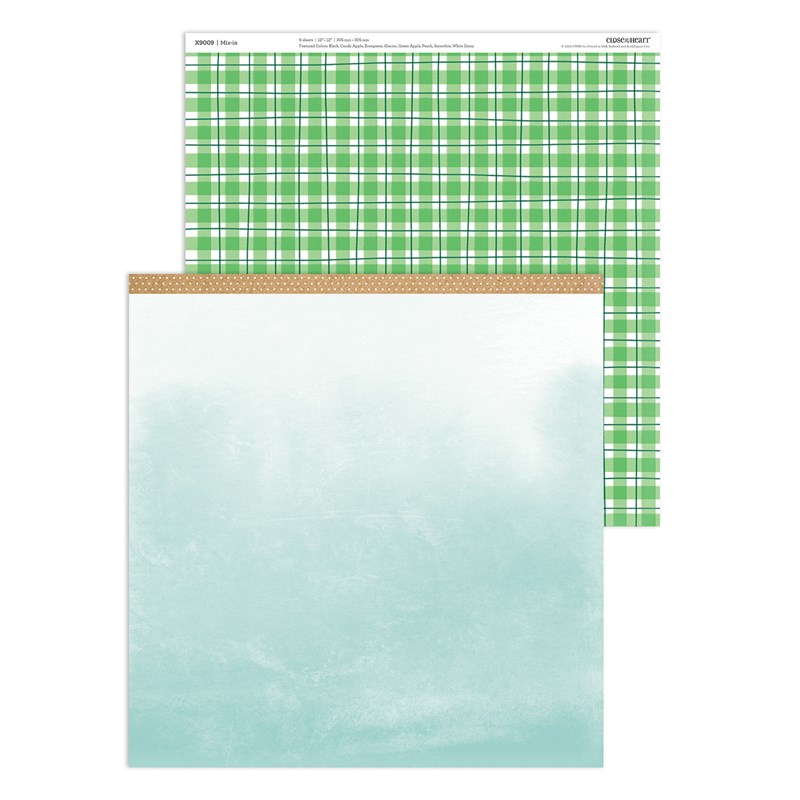
I love that our paper packets sometime include sheets that are a piece of artwork in themselves. Here is one from the Nov/Dec Mix In pack that looks like a watercolored sky.
Mix-in Paper Packet

There are several watercolor patterns in the Celebrate Today paper pack too: one is an all-over monotone look and the other is a background sheet with several rainbow colors.


Another way to faux watercolor is with the "Strokes of an Artist" stamp set. Using a regular ink pad, you can stamp texture that looks like it was painted.
Strokes of an Artist

The Cardmaking Workshop Kit for Celebrate Today teaches a number of methods to add color without actually "coloring" in traditional ways. These include: using watercolor paints, stamp rolling, tone on tone stamping, and stamping on colored cardstock.


If your stamp is relatively symmetrical, you can use the wrong (flat) side to "color" then add the detail with the regular (bumpy) side. 


I hope this post gave you some "out of the box" ideas for coloring! Please leave a comment before hopping on to see what Lauren has to share.

Sunday, December 15, 2019

Season to Sparkle


Join us in our monthly Technique Blog Hop during the Season to Sparkle! Go from blog to blog by following the links to see all the shiny art we have to share...


You've arrived from
Alyson Mayo's blog. If you get lost, Rudolph will light the way (or you can find a list on Melissa's blog).


This theme was hard for me because it's more along the creativity line, which is NOT my forte! At first, I wanted to use EVERY sparkly, shiny, glittery product we have; but I was able to refrain myself.


I looked at some of our fabulous How To books then I went to the CTMH Cricut Collections. Now that ALL of them are available to purchase, I had thousands of image choices!  So, which collection claims this image? One of the limited edition Christmas selections? No. A card from Artfully Sent? Nope. It's actually a page from Artbooking!!


I selected our White Glitter Paper for this layer. If you haven't tried it, there's no problem cutting it on the Cricut. I leave my machine on cardstock and use a standard mat, but not a new mat; it's like White Daisy Cardstock. If you cut a lot of glitter paper at one time, clean out your blade housing. I noticed this a few years ago when I cut pages of snowflakes.


I must have been making too many shaker cards lately because that's what I saw with the "window" in this image. I hid the holes in the page with the contour tool in design space. I had planned to mount the image on a card base so I sized it 1/4" smaller. But I didn't like the fancy corners on top of the square corners. I looked for a card shape to coordinate but didn't find one, so, I made one! I resized the image to card front size, duplicated the image, hid the window contours, and welded two together.

When I was picking out the sequin colors I kept going back and forth between silver and gold. I couldn't decide on a base color with either of these and the White Glitter Paper, so I added a backing to the window with Silver Foil Paper.


My card is finished off with White & Gold Skinny Ribbon. I decided to add it after the card was assembled so I used my ribbon trick: Whenever I want to save ribbon or when I need ribbon tied about a piece of paper, I tie it around a My Acrylix block first. That gives me a firm object to work with and I can snip the loop off center if the bow isn't going to be in the middle. I suggest using a block that's about twice the size of the paper (this was actually too big, but the one I had nearby). Keep the other end attached to the roll until you're finished also helps when making bows or tying knots.
Thanks for stopping by!!
Please leave a comment before you hop to Katy Taylor's blog.

Products Used:

  • White Glitter Paper
  • Silver Foil Paper
  • Sapphire Cardstock
  • 3-D Foam tape
  • Gold Sequins
  • White and Gold Skinny Ribbon
  • CTMH Artbooking Collection
  • Anti-Static Pouch
  • acetate or similar


Friday, November 15, 2019

Paper-Layering


Welcome once again to our monthly Technique Blog Hop. You may have arrived from 
Cat Scrapbooking. Be sure to check out all the posts by hopping to the next blogger until you get back to where you started. I'm sure you'll be inspired by the creativity, amazed by the artwork and/or learn something new.

If you get lost, a list of participants can be found here.


This month we are focusing on Paper Layering. This made me think of Cricut project with our fabulous collections. Did you know...ALL of the CTMH Collections are available for purchase?! This includes the two Christmas Collections:  City Sidewalks and Season of Joy.


I selection our newest collection, Complete Creativity, for my sample. I picked an 8.5x11 single page layout and adapted it to make a standard size card. Even though I know the math, it is easy to forget that the two sizes are in the same proportions. That means when you shrink an 8.5x11 down to 4.25x5.5, it's the same, just smaller!

There were a few elements of the layout I didn't need for a card, so I hid the photo mats and journaling boxes. I also switched the red to green and then swapped the bottom layer that appears as borders with the top mat layer.


Is is hard for you to image artwork in different colors?? It is for me! I selected the color palette from one of our new Paper Suites, Cedar and Pine. Did you know that the color swatches are in the catalog? I always find them helpful.


Here are the layers of the card when I assembled them. The very bottom is a blank card base. The trees are also layered! They cut as half circles and then are folded accordion style. These look great with our Two-Tone Cardstock!


After WAAAYYYY too many attempts to cut the sentiment in various sizes, I decided the best idea was to stamp the front of the card. (The part that says "tis the" is very fine.)  Ink can be a layer too!!

I actually found a stamp with a similar style! It's from the Holly Jolly - Cardmaking set.


I finished the card by accenting the stars with the Gold Shimmer Brush.  I wonder if I could make a layout from a card?? Do you re-size things in Design Space? Give it a try! Here is my DS file in case you're in a hurry.


One more word about the Close To My Heart Cricut products:  When shopping, always use your consultant's LINK to go to the Cricut web page. This is the ONLY way to find Complete Creativity. To find their link scroll all the way to the bottom of their web page where you'll find icons for various social media platforms. Click on the little green "C" square. If you don't have a consultant, I'd be happy to help you!

Please leave a comment below before checking out what Michelle Loncar has to share.