Showing posts with label Artbooking. Show all posts

Sunday, December 15, 2019

Season to Sparkle


Join us in our monthly Technique Blog Hop during the Season to Sparkle! Go from blog to blog by following the links to see all the shiny art we have to share...


You've arrived from
Alyson Mayo's blog. If you get lost, Rudolph will light the way (or you can find a list on Melissa's blog).


This theme was hard for me because it's more along the creativity line, which is NOT my forte! At first, I wanted to use EVERY sparkly, shiny, glittery product we have; but I was able to refrain myself.


I looked at some of our fabulous How To books then I went to the CTMH Cricut Collections. Now that ALL of them are available to purchase, I had thousands of image choices!  So, which collection claims this image? One of the limited edition Christmas selections? No. A card from Artfully Sent? Nope. It's actually a page from Artbooking!!


I selected our White Glitter Paper for this layer. If you haven't tried it, there's no problem cutting it on the Cricut. I leave my machine on cardstock and use a standard mat, but not a new mat; it's like White Daisy Cardstock. If you cut a lot of glitter paper at one time, clean out your blade housing. I noticed this a few years ago when I cut pages of snowflakes.


I must have been making too many shaker cards lately because that's what I saw with the "window" in this image. I hid the holes in the page with the contour tool in design space. I had planned to mount the image on a card base so I sized it 1/4" smaller. But I didn't like the fancy corners on top of the square corners. I looked for a card shape to coordinate but didn't find one, so, I made one! I resized the image to card front size, duplicated the image, hid the window contours, and welded two together.

When I was picking out the sequin colors I kept going back and forth between silver and gold. I couldn't decide on a base color with either of these and the White Glitter Paper, so I added a backing to the window with Silver Foil Paper.


My card is finished off with White & Gold Skinny Ribbon. I decided to add it after the card was assembled so I used my ribbon trick: Whenever I want to save ribbon or when I need ribbon tied about a piece of paper, I tie it around a My Acrylix block first. That gives me a firm object to work with and I can snip the loop off center if the bow isn't going to be in the middle. I suggest using a block that's about twice the size of the paper (this was actually too big, but the one I had nearby). Keep the other end attached to the roll until you're finished also helps when making bows or tying knots.
Thanks for stopping by!!
Please leave a comment before you hop to Katy Taylor's blog.

Products Used:

  • White Glitter Paper
  • Silver Foil Paper
  • Sapphire Cardstock
  • 3-D Foam tape
  • Gold Sequins
  • White and Gold Skinny Ribbon
  • CTMH Artbooking Collection
  • Anti-Static Pouch
  • acetate or similar


Saturday, June 15, 2019

Pocket Power! Technique Blog Hop


Welcome once again to our monthly Technique Blog Hop. You may have arrived from Lauren's CTMH Craftings. Be sure to check out all the post by hopping to the next blogger until you get back to where you started. I'm sure you'll be inspired by the creativity, amazed by the artwork and/or learn something new.

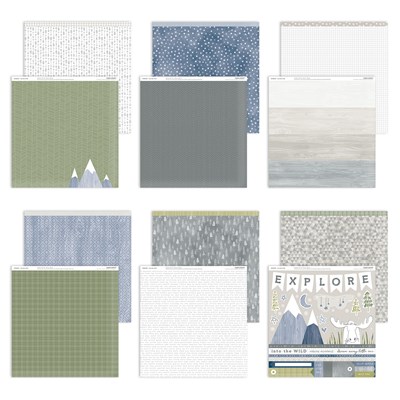
I'm using Into the Wild paper to scrap the outdoor adventures of our youngest son and his girl friend. This month I'm showing layouts from both the Workshop Your Way and Deluxe Scrapbooking Kit.

Sometime people have trouble with layout designs because they want to showcase more pictures than are shown on the page. I think it's faster, simpler and easier to copy a pre-designed layout design. I'd rather make fewer pages and add photos with flip flaps, pocket style memory protectors or pocket plus pages. I focus on the photo shapes and sizes and match those to the layout. With such a large variety of Memory Protectors, it's easy to add more photos, whether it's one or a dozen.

When I was laying out the pieces for these WYW pages, I realized the right side could easily be divided into 6" halves. That meant I could add a 6" x 12" flip flap, and more photos! It's like, make two pages, get one free! I used a third piece of the mountain paper cut down to 6" x 12" then I added the journaling space as directed in the instructions. I left the back 6" side as is since the arrow print was already used in this layout. The layering idea for those pictures is from last month's National Scrapbooking Month special, The World is Yours. I will also be adding a 4x4 flip flap to the bottom left square on the right page when I get the prints. And, I'm planning to have my son hand-write in the journaling space (we'll see if that actually happens). If you only have one photo to add, fill the other side of your flip flap with journaling or artwork. You can trim down a Picture My Life card to fit, or design your own.

We carry two types of 12x12 flip flaps for post-bound or D-ring albums: top load and side load. Which one you use is really a personal preference, but sometimes one is more practical for the situation.  A 6x12 flip flap is "stitched" around the top, bottom and one side. Because it is stitched in the same way, I used a side-load protector. I wanted the top and bottom seams to match and I didn't want to deal with the flip flap when I inserted the 12x12 page. Flip Flap adhesive is not very forgiving, so it's a good idea to figure out your placement and then use washi tape to keep everything together while you remove the protective strip.

You can print you photos in the sizes needed for layout designs, or try NOT to zoom in too much when taking pictures. Usually, it's easy to crop the image tighter before printing. Backing up after the picture has been taken, is very hard!.  I prefer to print after I select the layout, but if I already have a stack of 4x6 pictures, they can be trimmed down to smaller sizes, especially 4x4, if they haven't been "pre-cropped" by the photographer. Does your printer charge more for 4x4 than 4x6 prints? I don't know why, it's actually less, or the same, amount of paper! I even found one commonly used printer that doesn't offer 4x4 prints... Save money, back up a step or two and cut off the extra 2".

For the above layout from the Deluxe Kit, I had five vertical 4x6s that weren't easy to cut down, but I had three others that could be. Rather than pick just one of the 4x6 photos, I used flip flaps to add them all. You can stack multiple flip flaps like a book. In fact, they make great mini-albums! This time I put the flip flaps in a line for a fold-out.

Tip: Attach your photos back to back before sliding them into the flip flap. Fussing with them inside the pocket is annoying.


I prefer to cut my page protectors and attach the smaller flip flaps behind the base page photo. You can read my previous post about Installing Flip Flaps for more information.  I also like to add a "handle" to draw attention to the interactive element. I used some different stamps on these pages, including some from the You Are Here Cricut Cartridge Collection. These are perfect with In The Wild! To make the flip flap handle, I cut and stamped two identical pieces and attached them back to back over the flip flap using liquid glass.

A design space file is available for the Deluxe Workshop featuring Artbooking Cricut Cartridge. Tip: the triangle pages is adorable, but I had trouble with the triangle placement. I suggest a temporary adhesive to start, then you can stick them down better after they're in place. The directions recommend laying everything out, but the pieces really need to be attached so they don't shift or get brushed out of place while you're arranging them. Did you know?? If you apply our Bonding Memories glue and let it dry from blue to clear, the bond will be temporary, like a sticky note!!

What else can you do with flip flaps?
Here's a little video.

Please, leave a comment below before you hop off to see what Melissa has to share this month. She also has a list of all the participants in case you get lost going "Into the Wild."

product imageReady to shop? Here are the products I used:
Into the Wild Workshop Your Way Scrapbooking Kit
Into the Wild Deluxe Scrapbooking Kit (w/o stamp)
Z679 Liquid Glass
Z4089 Liquid Glass Fine Tip Applicator
Z3268 Flip Flaps Memory Protectors 6" x 12"
Z3231 Flip Flaps Memory Protectors 4" x 6"
Z1977 Memory Protectors Side Load Value Pack
Z3503 Cricut Artbooking Digital Collection
Z3502 Cricut You Are Here Digital Collection


Thursday, December 6, 2018

It's that time of year...

The Holiday Expressions catalog will end December 31, 2018. That means there is a retiring list and items start selling out. If there is something you've been waiting to order, now is the time!!

You can find the complete retired list here. I have the list in order by page number. Major changes include:

  • Red Album in post-bound and ring-bound
  • Pink Album in post-bound and ring-bound
Most of the other items are "normal" retirement items, all the printed paper/kits, all the stamp sets, SOTMs, etc.

Items already sold out are:
  • Z1382 Tweezers
  • Z1767 Chalk Marker
  • Z1768 Metallic Markers
  • Z1795 Quilling Tool
  • Z1805 Hook & Loop Dots
  • Z2197 Edge Distresser
  • Z3024 White Shimmer Trim
  • Z3090 Red Enamel Gems
  • Z3299 Cricut Artbooking Collection (CARTRIDGE)
  • Z3371 Gold Pearls
  • Z3400 Shimmer Brush-Bashful (previous color of the year)
  • Z4238 Wonder of the Season Stamp + Thin Cuts Bundle
  • Z4306 Thin Cuts--Merry Christmas
  • Z5205 Red 12" x 12" D-ring Album
With the busy holiday season upon us, keep in mind that delivery times may take 3-4 days longer in transit than you are accustomed to for your area. Close To My Heart is committed to staying within the 2-6 day in-house turnaround time, and encourage you to allow a few additional days for shipping times in order to accommodate the increased loads placed on parcel delivery services at this time of the year. 


Monday, October 15, 2018

Paste-fully Creative - CTMH Technique Blog Hop

Welcome to my first entry in a Blog Hop! And welcome to The Scrap Buzz, new visitors!!

If you have arrived here from  Maz Wood: aMAZing Close to my Heart Creations, you're in the right place. If you get lost, a full list of participants can be found here.

Theme Photo for Paste-fully Creative CTMH Technique Blog Hop
In case you missed it, there are several options for purchasing texture paste. The products are offered separately, or as part of the Boutique Deluxe Bundle which includes the Palette Knives, larger 3.9 jar of Opaque Matte,  a package of Stencil Sheets and a Sugarplum Shimmer Brush. You save 10% by purchasing the bundle.

We also offer a Texture Paste Trio of 1 oz jars in Transparent Matte, Transparent Gloss and Opaque Matte.


I was planning another technique and a school theme, but before I finished with paper selection I had a new idea. Could I make a hand print with texture paste? The answer is YES!

Scrapbook page with Kindergarten school photo and Texture Paste handprint

Texture Paste How To

I played with several variations, but a straight forward method was the best choice. Initially I was looking for a fine image like what you would expect with ink, similar to a finger print. The paste gives a fun textured image similar to paint.
    close-up of child's handprint made with Texture Paste on a scrapbook page
  1. "Butter" your hand with one of the Palette Knives, just like you would do bread. This should be a medium thickness. About half will transfer to the paper; the other half will remain on your hand.
  2. Just like stamping, press your hand straight down and after a few seconds, remove it straight up.
  3. Happy with your image? Texture Paste is great for us perfectionists because it's never going to be "perfect," so unless you're missing a finger, it's probably good to go!
  4. Scrape the excess paste off your hand with the Palette Knife or clean with a baby wipe, then wash thoroughly with soap and water. The paste is non-toxic in addition to acid-free. 
  5. Don't forget to replace the lid on the jar and clean up your knife and work area while the paste is wet. Set your project aside to air dry. I let mine sit overnight. 
Note that I left the paste white, straight from the jar. If you mixed the paste with color, you might have a colored hand for a few days!

close-up of embellishments used on Kindergarten school picture scrapbook page
Close-up of Cricut-cut shadow images title raised with 3-D foam tape


There are some tips below that cover a few issues I had when putting this page together. Please leave a comment before you head over to see what Vandra has to share.

Tips for Easier Tool Use

Cuttlebug Tip:  At the Annual CTMH North America Convention this year, we were told that on the Thin Cuts notebook edge it's hard to tell which is the positive and negative images. So, it's helpful to mark your die once you know which is which. (BTW-Sharpie will come off onto your C plate.) Also, to repeat the cut on a longer piece of paper, overlap just the very ends of the die. You may wish to use a piece of Washi Tape to hold things in place. I also suggest you start in the middle of the paper, then fill in each end so you don't have a little short piece to cut.

Tip for using the notebook edge border thin cuts from CTMH on a Cuttlebug

Tip #2: The Texture Paste can cause your paper to warp. You may be able to prevent this by using Washi Tape again. Attach your paper to the All-Purpose Mat. I didn't remember that so my paper was no longer flat (left side).

before and after pictures showing fix for warping caused by Texture Paste

I fixed it by spraying a little water on the BACK of my paper with a Spray Pen. It was moist, not wet. Then I washi taped it to my Versamat and let it dry. That did the trick (right side)!

Thanks for stopping by!

                  Tamara


Products Used


Monday, April 23, 2018

Cricut Expression users need to READ THIS


  • Cricut has announced that the Cricut Craft Room will CLOSE as of July 15, 2018. 
  • Legacy Machines are NOT compatible with Design Space.
  • Legacy Machines CAN continue to be used as stand-alone devices.
  • Cricut is offering $75 off new Explore machine or bundle for customers who haven't yet upgraded.

Read complete details from Cricut here.

I started with Expression and currently use Explore Air. If you have any questions about differences and transitioning, feel free to contact me. The decision to discontinue CCR (as well as to drop physical cartridges) was made by Cricut, not Close To My Heart. In fact, CTMH advocated for keeping physical cartridges. If you have specific comments about the decision, contact Cricut/Provo Craft.

One of the main reasons people have not upgraded yet is because Design Space is an online program and scrapbookers often craft where there is no Internet availability. Cricut has been working on this issue and currently offers Design Space Offline for iOS.

One of my favorite features of Design Space (DS) is that you can share files! For the Pretty in Pink promotion in February, we offered a Butterfly Mobile project and supply bundle. CTMH gave the DS file for everyone to use. 

Files look like this https://design.cricut.com/#/design/80804880. When you click on a DS file link, or cut and paste into your browser, the link will open the Design Space program and open the file. As long as you have the rights to use the images from the file, you can cut immediately. What a time saver! You can also share files with friends. I can send you files for Cricut Coordinating stamp sets that you purchase or help you re-size images for a project. 


The Explore machines use the same tools, mats and blades as the Expression. 

Saturday, March 17, 2018

Happy St. Patrick's Day!!

I did get my St. Patrick's Day cards made before the holiday, and mailed, but they won't be arriving on time. Fortunately, my family doesn't have high expectations, LOL. I found this design on Pinterest. An easy way to make a shamrock is to put several heart shapes together.


Almost everything on this card is retired. I've been wanting to do something with the All About the Golds Fundamentals overlay sheets from the clearance sale. I ended up using the Limeade Washi Tape also on clearance. The heart stamp is from Family is Forever, S1409. This set works with our Artiste Cricut Collection. Maybe next year I will try the same design with the heart from the Artbooking Collection. To make the green shamrock I went to Cricut Design Space, enlarged the heart shape and welded four together. The colors on the card are Topiary and Pear.

Here's a version with a stamped border. The sentiment is from the Sending Smiles stamp set, part of the Flower Market Cricut Collection.


The overlays have a film on the back (silver) side. I removed it after I cut the piece. I don't know that it would matter if you took it off first. I believe is is there for manufacturing purposes. The gold is actually on the front (gold) side. If you have trouble grabbing the plastic, use your paper piercer. I cut the overlay with my Fiskars Paper Trimmer.


I cut the front of my card base 1.5" from the top fold, and another 1.5" from the bottom. The overlay piece is 2" x 5.5". I attached the overlay piece to the bottom card base piece first. That made it easy to line up this piece on three sides with the card base when attaching to the front.

Here's how the front of the card looks on the inside. You could cover the seam with B&T, washi, ribbon, etc. I like the see-thru affect so I didn't cover them.

When I design or adapt a card design, I often try different variations trying to get everything "just right." I made six cards and there are four different designs. Which one do you like the best?


The green on the other cards is current: Willow Exclusive Inks and cardstock, the Willow watercolor wash paper is from Adventure Fundamental Paper Pack. I used the Thin Cuts - Scallop Border instead of the washi tape. This month we are having a sale on Thin Cuts including many retired sets.

Congratulations to the giveway winner...Linda!!


Thursday, July 2, 2015

More Throwback Thursday Graduation Layouts

More celebration of Graduation season and Throwback Thursday...
in 2013 Tommy paper (still available on Studio J) came out in the perfect colors for my son's graduation!

Layout #8 from Make It From Your Heart Volume 1.
Info on how I used Flip Flaps to make the announcement interactive can be found on my Facebook page.
"Liberty" die cut from Artbooking.


Notice the color I added to the white cardstock using our Spray Pen? I  previously wrote a blog post about this technique.


"Sideline Surprise" layout from Imagine. This one can be a little complicated with the angled photos. You can always change them to squares. Mine got a bit busy so I used ribbon to separate the two photos on the left pages and highlighted the action with frame shapes on the right side.

Diplomas are just rolled paper tied with Baker's Twine.

"Simple Contrast" from Cherish. Flip Flips on both right side photos; instead of three, I have seven photos. This layout also includes paper from Lucky, and it too is available in Studio J.


"Contrasting Elements" from Cherish. 
Borders cut using Art Philosophy cartridge.

Flip Flaps on the photo and the program.


Wednesday, October 22, 2014

Wedding Projects #1

Our oldest son married his high school sweetheart last month. My next several posts will be the items I made for the wedding.

 THE INVITATION
The monogram for the belly band was cut, then printed and finally stamped. That was probably not the easiest way to do it, but I was conserving paper! ;-)
You may not be able to tell, but the printing is in Outdoor Denim! 
Yes, you can tell your printer to match CTMH colors!! (Ask me how.)

Colors are:  Sorbet, Outdoor Denim and Colonial White
The invitations were mailed in our 5x7 Colonial White envelopes.

The paper pack is Claire. It is retired but I had quite a bit left. Turns out it wasn't enough though. Much thanks to all of my fellow consultants who were willing to give up packs from their stash!!  (One of the many reasons I love this company!) For the scrapbook, I'll be using Studio J. Did you know there are YEARS of retired paper on Studio J?  Currently there are 125 kit options. And, next month (November 2014) the Constant Campaign is a Studio J special!!

Here's the inside. I printed the invitation and enclosures at home on Colonial White, 
then stamped the images in Outdoor Denim ink. I also edged the top enclosure in Sorbet.
Stamp Set:  Hello Tweety (retired)
The film strip on the left was cut using the Cricut Artbooking Collection.
Now, does anyone have any ideas for all of these leftover pieces?

Quite the production!

Next:  Rehearsal Dinner Invitation...