Showing posts with label Design Space. Show all posts

Monday, November 15, 2021

Silver & Gold Technique Blog Hop

Welcome to The Scrap Buzz and this month's edition of the Technique Blog Hop. You have arrived from visiting Judy. Keep following the links to visit all of the participants. If you get lost, a Colette list can be found on Melissa’s page. This month we are featuring Silver & Gold.

This month, I put a little TECH in the technique hop. My project is not paper, it's fabric and vinyl! DID YOU KNOW Close To My Heart offers heat transfer vinyl (HTV)? It can be found under Specialty Paper (although it's not paper). You can do things with vinyl that can also be done with paper, including cutting it with a Cricut, Silhouette, etc. HTV can be used for things where paper wouldn't work or be permanent such as, to decorate the front of scrapbook albums, personalize items, and MAKE SHIRTS! 

In addition to our Cricut Collections and other Cricut images, you can also upload other types of images to Design Space. DID YOU KNOW, Close To My Heart offers digital art in the form of SVGs? 

What is an SVG file? An SVG file, short for scalable vector graphic file, is a standard graphics file type used for rendering two-dimensional images on the internet.

To me, that translates as, “works with electronic cutting machines!”  You can find the images offered on your makers website by going to SHOP, then to the Digital Art category. Individual images are only $1, plus there’s no shipping! I used the Craft Queen image for my shirt and cut it from our Silver Glitter HTV. (Note:  I pre-washed my shirt.) In case you missed it, the coordinating die cut for the paper suites are now SVG (instead of specifically Cricut images), so they're now more usable to more people!

Sometimes a special promotion will include an SVG, such as the new Merry Making ornaments. Once you purchase an ornament product, the SVG files are added to your digital library automatically. You can have your glitter paper cut and ready to adhere to the ornaments as soon as they arrive!! I've heard a lot of questions about where to find Digital Art after purchase.  Access your digital library from your Maker's website by clicking on your name to open the drop down menu. From there, click on account. On the left side, (or new drop down menu), select Digital Library. All of your purchased images will be here. Click on the blue download icon to add them to your device.

The next question is always "How to do I upload Digital Art to Cricut Design Space?" Here's a step-by-step:

  1. Open the Cricut App on your PC [or Apple device]. Start a NEW PROJECT.
  2. Click on UPLOAD.
  3. UPLOAD IMAGE with Drag & Drop or [BROWSE FILES] and select your downloaded image.
  4. You may with to give your image a name (and tag with keywords). Click UPLOAD [SAVE].
  5. Your new image will now show under Recent Uploads [Images]. Click on it and ADD TO CANVAS [INSERT].
  6. Next time you want to use this image, click on UPLOAD, then look for it under Recent Uploads, or View All [Open Uploaded Images]. You can also search for it with one of your keywords. 
  7. Resize your image as desired.
  8. MAKE IT.
  9. If the preview looks like all of the parts of your images are being cut separately, and not spaced correctly, CANCEL to go back to the [CANVAS], then select the entire image, and [ACTION] ATTACH. Continue with MAKE IT. (Note:  this is for single color images. For layered images, each color needs to be attached separately.)
  10. For HTV, be sure to MIRROR [on CANVAS, EDIT, HORIZONTAL] the image so that it's backwards.
  11. Put vinyl shiny side down on your mat. 
  12. Use Vinyl setting on your machine. CONTINUE and cut image.
  13. Weed the vinyl.
  14. Follow Easy Press/iron instructions. Here is an online Heat Guide and a printable version.  For CTMH's vinyl FAQ sheet, click here.
  15. Pre-heat Easy Press/iron.
  16. Make sure there are no wrinkles in fabric, or other item is flat and stable.
  17. Pre-heat the base item to which you are adding the vinyl.
  18. Lay Vinyl on your base, shiny side up this time (so you can read it), check placement.
  19. Heat the vinyl as directed. 
  20. Heat the image from the backside of a shirt too.  This isn't necessary on an album.
  21. Check adhesion. Reheat for a few seconds if needed.
  22. Remove plastic backing when directed (hot or cold).

Think of all the fun crafts you can make for the holidays using HTV:  matching family shirts, monogrammed napkins, personalized gifts, and of course, albums! 

A few years ago, I made this video to show how to put vinyl on an album. The vinyl image shown in the video is from  These Are My People kit.

I have been asked to do a live video showing how to size images in Cricut for items like the Merry Making ornaments, so watch my Facebook page for that!  I think it will be a Zoom video because I think I can do the screen share thing! (We'll find out.)

 Before you go on to see what Katy is sharing, please leave a comment. If you do not have a Maker, let me know how I can help, and check out my website.


Tuesday, December 15, 2020

Blissful Brackets - CTMH Technique Blog Hop


Welcome to December’s Technique Blog Hop. This month we are focusing on brackets. If you stumbled upon us, just click the links to hop from post to post until you end up here again. The complete list of participants can be found HERE.

If you’ve come from Brandi’s Blog, you’re in the right place.

It’s been quite a while since I participated in this hop. We went a little over-board with the go home idea and have been driving between Oregon and Ohio to finish a major remodel on an old house. That sale closed last week and now a family has a new home for Christmas! And we also decided to move back home to Ohio. After several months of living with relatives, we may have a new address in the new year.

Right now, most of our stuff is still packed. We couldn’t find warmer clothes so I had to do some shopping for coat, gloves, boots. The winter weather is different in Ohio than Oregon! I have more supplies unpacked than clothes, but still can’t seem to find the “one thing” I need. Here’s the card I made:


Brackets are a popular shape and pop up in a lot of different places, like this sticker from the Jingle Joy suite!

.

There are also quite a few bracket shapes in the Close To My Heart Cricut Collections. I pulled in several while I was planning my project, and even used Design Space to design this card. This is a 5x7 card. Here’s is the DS link for my file:  


I used Diamond Stickles to spice up the Raspberry strip. This technique is taught in the Jingle Joy Cardmaking workshop. 


The sticker was “unstuck” with the Anti-Static pouch and popped up with Thin 3-D Foam Tape. The regular thickness might have given it better dimension, so I went around the edge with Green Stickles. Since it was already attached, I slid the All-Purpose mat under the edge to protect the rest of my card.


If you don't have a Close To My Heart Maker (Consultant), you can shop from my website.

.

Perhaps you will see some of these other brackets during the hop. They gave me ideas for other projects. One of my favorite Cricut cuts this time of year is the gift card holder. The yellow shape is the gift card holder. The black rectangle represent a regular (credit card) size gift card. 


When I first used this shape, I wasn’t sure how to fold and glue it. The W diagram shows how to fold it. Put adhesive in between the two middle sections, just at the bottom edge(s) near the front and back sections. There needs to be space to slide in the gift card.


Making gift tags can be faster, simpler, and easier with brackets! Whether layered or not, just cut a sheet of these shapes then stamp “to” and “from.” 

These are standard size cards with a bracket cut out. I made 3x4 and 3.5x5 black rectangles to represent photos. You can use these cards when featuring a picture on your Christmas cards. Remember, you can always adjust the size of the opening, or the card itself, to fit you photo.

Please leave a comment before continuing to see what Cat has to share

Friday, May 15, 2020

Stencil It! CTMH Technique Blog Hop


Welcome to our May blog hop! You've come from the blog of Hayley Dyer. To continue the Hop, just follow the links from blog to blog until you get back to where you started. If you get lost, you can find a list of participants on Melissa's page. This month we are highlighting stencils. That may sound old school to you, but I'm sure you'll find new ideas for personalizing your art work! Before showing you my project, I have an announcement to make:

...And the award for the Official stamp set of the Pacific Northwest 
goes to..."Make a Splash!!" {Applause}

Make a Splash
I knew I needed this set as soon as I saw it in the May/June catalog. It is pretty adorable even if you don't live in a rain forest. Don't you think?? Plus the sayings are appropriate for almost anyone, anytime and I was surprised by how perfect the set is for these crazy pandemic times. If you need more rainy weather stamps, check out "When Skies Are Grey."

I wanted to showcase this set and was also inspired by the Blue Skies cardstock, part of May's special for National Scrapbooking Month. I love the UV coating and wanted to make something similar. 

Can you see the raindrops? 
This card pattern is #7 in Make It From Your Heart Volume #4. I always think rain boots are yellow; too much Curious George as a child I guess! I paired it with one of the papers in Stitched Together. Do you see anything stitched or quilt-related in this design? That's what I love about our B&T Duos and paper packs: any pattern that highly themed is usually universal on the reverse side. Can you see the upside-down raindrops on this paper?? I think they're supposed to be flower petals. That would be something else I could do with my stencil!


Here's how I made my card:  The rain drops are from an overlay image in the Cricut Artistry Collection.  In Design Space, I added the image then used [Contour] to hide the outer line of the image; this gave me just drops to cut out. I used [Duplicate] to copy the image, next I used [Contour] again to "remove" a few drops at the bottom. I made a copy of the edited image with [Duplicate]. Now I had three images, the original, and two edited copies. I lined these up by utilizing the [Position] coordinates. Finally, all three images were "connected" with [Attach] to cut as one item. When cutting the stencil, I made sure to move it over so that there was at least 1" around all three sides when finished.

Before putting the raindrops on my paper, I stamped the two sentiments in Sapphire ink. I rubbed the Anti-Static pouch over this piece and then tacked it in place on a piece of desk pad paper. The stencil was positioned over the cardstock. The drops are fewer near the bottom so I kept away from "splash" but went right over the sentiment at the top. I used the VersaMark pad right on the stencil. After removing the stencil, I used clear embossing powder and embossed as usual. 


Note: Your stencil will be sticky from the VersaMark ink. I first tried cleaning it off with Spritz and a rag.That wasn't bad, but I had so many layers from experimenting, it wasn't quite enough. On my way to the sink, I passed some baby wipes. The wipes worked, at least with my pre-wash. I wouldn't use the chemical disinfectant wipes everyone is hoarding right now, but alcohol-free, mild baby wipes may work. Otherwise, go with my first thought, clean it with a mild soap and water.


To make the puddle at the bottom, I grabbed my Mint Shimmer Brush.


Inside, is another boot, this time stamped with Mink instead of Black so the image is defined, but not overwhelming the sentiment. These could have been stamped right on the card base, but I wanted the flowers to be a separate piece so that the marker didn't show through the back. 


Now, I would never have fussy cut these flowers out of the paper. Even cutting out the boots would have been pushing it, and those are a much simpler design. But with Thin Cuts, it was no problem! It's one of the main reason I bought this stamp set, I can use these flowers for many other projects. The flowers are colored with Tri-Blend markers. 
*I've since decided that Green Turquoise (light end) is a better match for Mint. I'd call the Dull Green colors > Green Apple (light), Sage, and New England Ivy (light). For Sweet Leaf I like Citrus Green (light end). Those of us in the matchy-matchy OCD world can get really freaked out about color matching! But, the truth is, on these tiny images, none of which are even shown with the patterned paper, it doesn't matter (too much!).

Please leave some love in the comment section below!


Thanks for stopping by!! Next, head over to see what fabulous-ness Maz Wood has for you this month.

🛒🛒Ready to shop? Head to my website to find the products I used:

  • Make a Splash stamp set (available with or without Thin Cuts)
  • Stitched Together paper pack (available with or without sticker sheet)
  • Lemonade Cardstock
  • White Daisy Cardstock
  • Mint Shimmer Brush
  • Intense Black ink pad
  • Sapphire ink pad
  • Mink ink pad
  • Tri-Blend markers (see colors above)
  • VersaMark pad
  • Anti-Static Pouch
  • Clear Super Fine embossing powder
  • Heat Tool
  • Stencil Sheets
  • Card Bases and Envelopes value pack
  • Artistry Cricut Collection (use this link to shop Cricut)


Sunday, December 15, 2019

Season to Sparkle


Join us in our monthly Technique Blog Hop during the Season to Sparkle! Go from blog to blog by following the links to see all the shiny art we have to share...


You've arrived from
Alyson Mayo's blog. If you get lost, Rudolph will light the way (or you can find a list on Melissa's blog).


This theme was hard for me because it's more along the creativity line, which is NOT my forte! At first, I wanted to use EVERY sparkly, shiny, glittery product we have; but I was able to refrain myself.


I looked at some of our fabulous How To books then I went to the CTMH Cricut Collections. Now that ALL of them are available to purchase, I had thousands of image choices!  So, which collection claims this image? One of the limited edition Christmas selections? No. A card from Artfully Sent? Nope. It's actually a page from Artbooking!!


I selected our White Glitter Paper for this layer. If you haven't tried it, there's no problem cutting it on the Cricut. I leave my machine on cardstock and use a standard mat, but not a new mat; it's like White Daisy Cardstock. If you cut a lot of glitter paper at one time, clean out your blade housing. I noticed this a few years ago when I cut pages of snowflakes.


I must have been making too many shaker cards lately because that's what I saw with the "window" in this image. I hid the holes in the page with the contour tool in design space. I had planned to mount the image on a card base so I sized it 1/4" smaller. But I didn't like the fancy corners on top of the square corners. I looked for a card shape to coordinate but didn't find one, so, I made one! I resized the image to card front size, duplicated the image, hid the window contours, and welded two together.

When I was picking out the sequin colors I kept going back and forth between silver and gold. I couldn't decide on a base color with either of these and the White Glitter Paper, so I added a backing to the window with Silver Foil Paper.


My card is finished off with White & Gold Skinny Ribbon. I decided to add it after the card was assembled so I used my ribbon trick: Whenever I want to save ribbon or when I need ribbon tied about a piece of paper, I tie it around a My Acrylix block first. That gives me a firm object to work with and I can snip the loop off center if the bow isn't going to be in the middle. I suggest using a block that's about twice the size of the paper (this was actually too big, but the one I had nearby). Keep the other end attached to the roll until you're finished also helps when making bows or tying knots.
Thanks for stopping by!!
Please leave a comment before you hop to Katy Taylor's blog.

Products Used:

  • White Glitter Paper
  • Silver Foil Paper
  • Sapphire Cardstock
  • 3-D Foam tape
  • Gold Sequins
  • White and Gold Skinny Ribbon
  • CTMH Artbooking Collection
  • Anti-Static Pouch
  • acetate or similar


Friday, November 15, 2019

Paper-Layering


Welcome once again to our monthly Technique Blog Hop. You may have arrived from 
Cat Scrapbooking. Be sure to check out all the posts by hopping to the next blogger until you get back to where you started. I'm sure you'll be inspired by the creativity, amazed by the artwork and/or learn something new.

If you get lost, a list of participants can be found here.


This month we are focusing on Paper Layering. This made me think of Cricut project with our fabulous collections. Did you know...ALL of the CTMH Collections are available for purchase?! This includes the two Christmas Collections:  City Sidewalks and Season of Joy.


I selection our newest collection, Complete Creativity, for my sample. I picked an 8.5x11 single page layout and adapted it to make a standard size card. Even though I know the math, it is easy to forget that the two sizes are in the same proportions. That means when you shrink an 8.5x11 down to 4.25x5.5, it's the same, just smaller!

There were a few elements of the layout I didn't need for a card, so I hid the photo mats and journaling boxes. I also switched the red to green and then swapped the bottom layer that appears as borders with the top mat layer.


Is is hard for you to image artwork in different colors?? It is for me! I selected the color palette from one of our new Paper Suites, Cedar and Pine. Did you know that the color swatches are in the catalog? I always find them helpful.


Here are the layers of the card when I assembled them. The very bottom is a blank card base. The trees are also layered! They cut as half circles and then are folded accordion style. These look great with our Two-Tone Cardstock!


After WAAAYYYY too many attempts to cut the sentiment in various sizes, I decided the best idea was to stamp the front of the card. (The part that says "tis the" is very fine.)  Ink can be a layer too!!

I actually found a stamp with a similar style! It's from the Holly Jolly - Cardmaking set.


I finished the card by accenting the stars with the Gold Shimmer Brush.  I wonder if I could make a layout from a card?? Do you re-size things in Design Space? Give it a try! Here is my DS file in case you're in a hurry.


One more word about the Close To My Heart Cricut products:  When shopping, always use your consultant's LINK to go to the Cricut web page. This is the ONLY way to find Complete Creativity. To find their link scroll all the way to the bottom of their web page where you'll find icons for various social media platforms. Click on the little green "C" square. If you don't have a consultant, I'd be happy to help you!

Please leave a comment below before checking out what Michelle Loncar has to share.

Saturday, June 15, 2019

Pocket Power! Technique Blog Hop


Welcome once again to our monthly Technique Blog Hop. You may have arrived from Lauren's CTMH Craftings. Be sure to check out all the post by hopping to the next blogger until you get back to where you started. I'm sure you'll be inspired by the creativity, amazed by the artwork and/or learn something new.

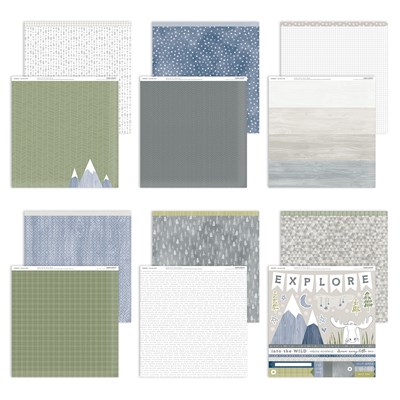
I'm using Into the Wild paper to scrap the outdoor adventures of our youngest son and his girl friend. This month I'm showing layouts from both the Workshop Your Way and Deluxe Scrapbooking Kit.

Sometime people have trouble with layout designs because they want to showcase more pictures than are shown on the page. I think it's faster, simpler and easier to copy a pre-designed layout design. I'd rather make fewer pages and add photos with flip flaps, pocket style memory protectors or pocket plus pages. I focus on the photo shapes and sizes and match those to the layout. With such a large variety of Memory Protectors, it's easy to add more photos, whether it's one or a dozen.

When I was laying out the pieces for these WYW pages, I realized the right side could easily be divided into 6" halves. That meant I could add a 6" x 12" flip flap, and more photos! It's like, make two pages, get one free! I used a third piece of the mountain paper cut down to 6" x 12" then I added the journaling space as directed in the instructions. I left the back 6" side as is since the arrow print was already used in this layout. The layering idea for those pictures is from last month's National Scrapbooking Month special, The World is Yours. I will also be adding a 4x4 flip flap to the bottom left square on the right page when I get the prints. And, I'm planning to have my son hand-write in the journaling space (we'll see if that actually happens). If you only have one photo to add, fill the other side of your flip flap with journaling or artwork. You can trim down a Picture My Life card to fit, or design your own.

We carry two types of 12x12 flip flaps for post-bound or D-ring albums: top load and side load. Which one you use is really a personal preference, but sometimes one is more practical for the situation.  A 6x12 flip flap is "stitched" around the top, bottom and one side. Because it is stitched in the same way, I used a side-load protector. I wanted the top and bottom seams to match and I didn't want to deal with the flip flap when I inserted the 12x12 page. Flip Flap adhesive is not very forgiving, so it's a good idea to figure out your placement and then use washi tape to keep everything together while you remove the protective strip.

You can print you photos in the sizes needed for layout designs, or try NOT to zoom in too much when taking pictures. Usually, it's easy to crop the image tighter before printing. Backing up after the picture has been taken, is very hard!.  I prefer to print after I select the layout, but if I already have a stack of 4x6 pictures, they can be trimmed down to smaller sizes, especially 4x4, if they haven't been "pre-cropped" by the photographer. Does your printer charge more for 4x4 than 4x6 prints? I don't know why, it's actually less, or the same, amount of paper! I even found one commonly used printer that doesn't offer 4x4 prints... Save money, back up a step or two and cut off the extra 2".

For the above layout from the Deluxe Kit, I had five vertical 4x6s that weren't easy to cut down, but I had three others that could be. Rather than pick just one of the 4x6 photos, I used flip flaps to add them all. You can stack multiple flip flaps like a book. In fact, they make great mini-albums! This time I put the flip flaps in a line for a fold-out.

Tip: Attach your photos back to back before sliding them into the flip flap. Fussing with them inside the pocket is annoying.


I prefer to cut my page protectors and attach the smaller flip flaps behind the base page photo. You can read my previous post about Installing Flip Flaps for more information.  I also like to add a "handle" to draw attention to the interactive element. I used some different stamps on these pages, including some from the You Are Here Cricut Cartridge Collection. These are perfect with In The Wild! To make the flip flap handle, I cut and stamped two identical pieces and attached them back to back over the flip flap using liquid glass.

A design space file is available for the Deluxe Workshop featuring Artbooking Cricut Cartridge. Tip: the triangle pages is adorable, but I had trouble with the triangle placement. I suggest a temporary adhesive to start, then you can stick them down better after they're in place. The directions recommend laying everything out, but the pieces really need to be attached so they don't shift or get brushed out of place while you're arranging them. Did you know?? If you apply our Bonding Memories glue and let it dry from blue to clear, the bond will be temporary, like a sticky note!!

What else can you do with flip flaps?
Here's a little video.

Please, leave a comment below before you hop off to see what Melissa has to share this month. She also has a list of all the participants in case you get lost going "Into the Wild."

product imageReady to shop? Here are the products I used:
Into the Wild Workshop Your Way Scrapbooking Kit
Into the Wild Deluxe Scrapbooking Kit (w/o stamp)
Z679 Liquid Glass
Z4089 Liquid Glass Fine Tip Applicator
Z3268 Flip Flaps Memory Protectors 6" x 12"
Z3231 Flip Flaps Memory Protectors 4" x 6"
Z1977 Memory Protectors Side Load Value Pack
Z3503 Cricut Artbooking Digital Collection
Z3502 Cricut You Are Here Digital Collection


Monday, January 21, 2019

New Product Artwork

Here are some things I've made with the new products in Seasonal Expressions #1 for 2019...


Years of Sweetness coordinates with the Cricut Artbooking Collection. I love the bold font! *NEW* this season is the inclusion of the Design Space code numbers for the shapes! The B&T Duos on this card are from Something Fierce.


This card mixed the new So Much Happy paper and washi tape with a retired Stamp of the Month (Balloon Animals).


Here are a few more with So Much Happy paper. (Not to be confused with sooo much happy paper!! Although that would be easy to do with all the bright colors!) "Birthday Wishes" is from the January SOTM Card Captions. The stamps on the right card are from Easter Bunny.


Have you seen the new pet stamps?! This card uses Paw Prints on My Heart and Purrrrific with the I Heart Us paper. (And a retired background stamp, Paws.)


Here's one where I mixed the Heart Happy paper with Love in Bloom. This unique layered image has each stamp numbered. Stamp the images in order, each with a different color. For this card I matched the Heart Happy colors: Sapphire, Pixie, Mint, Ballerina, and Candy Apple

Here are a few more Heart Happy cards where I made adjustments to the given directions:


Different ideas for using up the complements and cut apart sheet images. The coordinating stamp, A Piece of My Heart,  is also available through February 28, or while supplies last.


I changed this Valentine to a Welcome Baby card! The stamps are from a previous stamping special and were called Hello Life.

You may see some of these cards in upcoming $5 Friday Card Workshops! Go here for a complete schedule of events.

It appears I'm missing some pictures, so check back soon for more new product artwork!