Showing posts with label All-Purpose Mat. Show all posts

Thursday, April 15, 2021

Dazzling Dimension - CTMH Technique Blog Hop


Welcome to The Scrap Buzz and this month's edition of the Technique Blog Hop. You have arrived from Miss Carrie's page. Keep following the links to visit all of the participants as we Show You How to add Dazzling Dimension to your projects.

When I think of dimension, I think of layers. I chose to use the Layered Flower Background Thin Cuts. These have been in my stash for a while but I hadn't gotten around to playing with them. All three dies come together.

These dies are so well designed it makes "fancy" cards Faster, Simpler, and Easier to make! The hardest thing is deciding which paper(s) to use. To select my colors, I turned to our fabulous Love of Color books. In Volume 2 I found the combination of Sangria, Peacock and Linen. In Volume 1 I found Sundance, Desert Rose, Peacock and Peach. Then I consulted the color wheel and found Sangria, Peacock and Sundance formed a triangle; they are a triadic color combination.

Do you save ridiculously small scraps??  I saved the dots and the largest leaves and made a little flower on the inside of my card. I know I tossed quite a few tiny pieces and Cricut negatives when we moved last summer, so I figured I could start a new collection! The dots might be nice in shaker cards. I used a sentiment from the Operation Smile set called Every Bit of Wonderful.


To give my card extra dimension, I cut the three layers again out of some retired paper. When assembling, I attached the two identical layers first, then attached them to the card base, bottom to top. Does it look like there is much difference? FYI I weighed my card and it is still until the 1 ounce for first class letter postage in the US.


I had to try another color combination. This time I pulled three colors from the Lovely collection: Blue Belle, Sage, and Ballerina. I cut two 4.5x12 pieces from each 12x12 sheet so I could make four cards. When cutting the bottom two layers I didn't have any trouble and was able to get both dies on the CTMH cutting mat at the same time. I did not try to cut multiple layers, just because I was mixing colors. When doing the top layer I found it worked best if I cut it alone and it needed more pressure than I usually use. I set my CTMH die cutting machine to +1 and ran it through two times. The next time I make one of these, I’ll check it after one pass. TIP:  I learned with my old Cuttlebug to place large straight dies at an angle so the transition isn’t as severe. 


Another way to use this die is to cut all the layers out of the same color. Since I cut each color with all three dies, here’s what that might look like (the layers aren’t attached). I flipped every other layer so it showcases our two-tone cardstock. For these I also added a solid layer but the other cards are built on the white card base. This might be a great way to use up old colored card bases or 8.5 x 11 cardstock!


The first card I assembled I tried one of the liquid tombow glues. I thought I would need "wiggle" room. But the CTMH Adhesive Runner worked better. Don’t forget to work on top of the All-Purpose Mat. I put the top two layers side by side and ran the adhesive along both edges at once. If you have any way-ward dots, use the Rub and Remove Eraser to remove them.


Your next stop is Melissa Robinson. She also has a list of all participants in case you get lost.


Tuesday, October 15, 2019

Back to the Basics


Sometimes, we get so obsessed with new that we forget the tried and true. This month, we're going Back to the Basics to remind ourselves that these techniques are timeless options for stamping and scrapbooking. 

If you've arrived from  Michelle's blog, you're in the right place! If you just happened to stumble in, welcome to The Scrap Buzz! My posts tend to be long, because I want to share ALL the details!

To view all the posts in this month's blog hop, follow the link in each post to the next blog until you arrive back where you started. If you get lost, or run across a broken link, you can find the complete list of participants on Melissa's blog.

Let's review RANDOM STAMPING. This technique can be used to create your own Background & Texture (B&T) paper. It is my favorite for scrapbooking sports because I can customize my paper every year using a few stamps and the team colors.

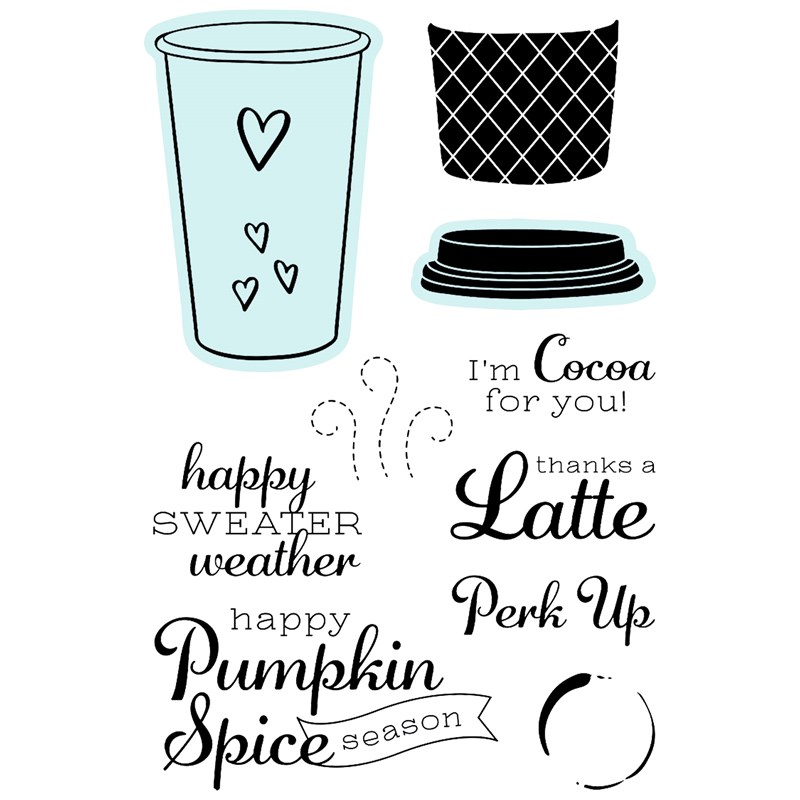
To begin, stamp two images, then stamp a third to form the points of a triangle. The distance between images will depends on the size of the stamp, what else you plan to add, and the size of your paper. The stamp I used was the coffee ring from the Perk Up stamp set. After making one triangle, use two of the previously stamped images and add a fourth to form another triangle. Repeat until you are happy with the result and/or fill up the paper. If you are using more than one stamp image, start with the largest then go back and fill in using the smallest image last.

For my project, I chose the Hawthorn paper pack and selected ink colors to match. Did you know these colors are listed 
  1. on my website with the paper
  2.  in the catalog at the beginning of each paper suite
  3. on the last page of the recipe booklet
  4. on the zip strip for each B&T paper.
I found some pumpkin spice lip balm and had to make a fun card with Perk Up! I selected the leave/green print paper to be the base of the card. On the front, I added a piece of Sage cardstock,   light side up, to coordinate with the Hawthorn paper. My first ink color was Toffee. Notice that I didn't make the triangles very even. The point of random stamping this paper was to add some texture. I focused on two opposite corners and made one "heavier" than the other. Next, I used our new Paprika ink. At this point I needed more so I stamped another round with the same color. These three images form their own triangle but they also form triangles with the three previous Paprika images. Notice too that I am overlapping my images this time. Sometime this works, it depends on the stamps.

Finally, I stamped two sets of rings in Pebble; you can barely see them. To keep the upper corner heavier, I stamped more of the rings on the paper. In the bottom corner, the more of the ring images go off the paper. Always stamp some of the images off the edge or your paper when random stamping. It helps the visual and prevents a trapped or framed look.

After stamping a few sets of ring images, I laid the elements of my card in place to see if more rings were needed.

Tip: When using the Versamat as your stamping surface, either lay a piece of scrap paper over it, or clean if off when your done. I love that the Stamp Shammy is perfect for this!! If you don't wipe the ink off the Versamat, you may lay something down and pick up the ink where you don't want it. 


Here is my finished card! Our B&T duos are just perfect for cards like this when both sides of the paper show. On the outside of the card, I used the October Stamp of the Month, Autumn Air. "Fall" is embossed with Princess Gold powder. "Is in the air" is stamped in Charcoal ink. I made sure to leave room in this area while I was random stamping. The inside sentiment from Perk Up is stamped in Paprika.


This fancy fold design came from a make up sample I received. I copied the design and adjusted the size. I did several of these a few years ago, measuring and scoring each card individually. This time, I made a Cricut DS file. If you would like to try this card, you can use my file for FREE!


Next, hop over to see what Amy has created.


If you're ready to shop, and don't have a consultant, you can find these products on my website.

Note: There are thin cuts for Perk Up, but they are currently unavailable. More are scheduled to arrive soon!

Products Used:
Perk Up stamp set & thin cuts
Autumn Air - October SOTM
Pebble
Charcoal
Versamat
All-Purpose Mat
Stamp Shammy
Princess Gold embossing powder
Anti-Static Pouch
Versamark ink
Heat Tool


Monday, July 15, 2019

Mix It Up!


Do you love our Mix In paper packs?! These collections are designed to MIX IN and coordinate with every other paper collection in the current Idea Book, or use on their own! Right now, the Mix-In colors are Ballerina pink plus neutral black, white, and grays. One of the things about our B&T (background and texture) Duos that I like is, if one side doesn't suit your taste, turn it over!

If you've arrived from Daryls' page, you're right on track. If you're starting here, follow the link at the bottom to "hop" the next blogger's page. Proceed until you complete the circle and arrive back on my page again.


As life often is, mine is busy and somewhat extra complicated right now, so I'm "cheating" by showing you a piece of artwork I CASEd (Copy And Steal Everything) from the Seasonal Expressions 2 Idea Book. But that's OK, that is the purpose of an IDEA book. But, did you know, the recipes for all the beautiful pieces are available to you?

On your consultant's website site, go to "More" and select "View Catalog." Then scroll down to the pdf link for Recipes. All the ingredients are listed including colors, stamp(s) and tools used. If Cricut shapes were used, the recipe will list the collection name, size, shapes name and DS code.

 Here's the recipe for this card:

PAGE 82
4¼" x 5½" Happy Birthday Card (Horizontal)

A1228 My Acrylix® Special Day Duo Stamps
X9005 Mix-in Paper Packet
X6028 Black Cardstock
X5988 Peach Cardstock
X6018 Raspberry Cardstock
X6022 Smoothie Cardstock
Z891 VersaMark™ Ink Pad
Z4057 Craft On Rubber Shapes
Z4213 Silver Embellishing Thread
Z2068 Ranger™ White Super Fine Emb Powder
Z4220 Anti-static Pouch
Z4252 Heat Tool
1772 Glue Dots® Ultra-thin Dots

Guess what? The ONLY piece of Mix-Ins I have used to date is the one featured in the catalog. Could I just substitute that one piece? Me?? No! Any normal person? Yes!!


So if I was going to substitute for the B&T I might as well substitute the cardstock too. The colors used in the sample seemed a rather odd combination. By looking at the CTMH Color Wheel, I was able to determine the "formula:" one color from one section, skip a section, two colors from the following section. I'm sure there is a fancy name for this arrangement, comment below if you know it!!
My colors are:

Emerald from the green section
(skip the Blue-Green section)
Carolina and Bluebird from the Blue Section

Oh look, I picked blue and green!! Totally unplanned but probably done unconsciously; they're my favorite color combo!!

I had to decide which color was going to go where. That's hard!! When I was cutting the B&T from Mix-Ins, I made it a 4" x 5.5" rectangle. I know that I can get three piece across a 12" piece, and as long as I was making one card, I might as well make three. Then I cut each of the other three shapes from each of the other three colors and mixed them. This pattern is similar to, or a variation of , #16 from Make It From The Heart, Volume 4 (MIFTHV4#16).

Instead of the Craft On Rubber Shapes, I used Black & White dots. (On one card I used some retired Emerald dots from the Cats & Bats collection.

Have you ever heat embossed? Has it been forever?? We all love this technique so I'm not sure why we don't use it more often. If it really has been a while, check out what Close To My Heart offers now including a new heat tool, tinsel embossing power, and an anti-static pouch.

The pouch is great for keeping stray embossing power off your paper so that it only sticks to the ink. I also use it on the back of stickers when using them as die cuts. The powder inside the bag sticks to the sticker adhesive so it's not sticky. It's much faster, simpler and easier than using baby powder. The pouch also tames your lose sequins. Just throw it in the bag when they're new and give it a little shake. Remove the pouch and your sequins will stop doing their Mexican Jumping Beam imitation.

Another item I think is a must have for heat embossing is the All-Purpose Mat. The large size protects your craft space. It is also double sided. The smooth, shinny side is a non-stick surface. Keep your adhesive off the back of your project! You can also use it as a palette for watercolor projects and mixing ink colors. The other side is slightly tacky, which keeps it from sliding on your work surface. If you turn this tacky side up, it keeps embossing powder for dusting everything in the craft room. You can wipe or wash it off as needed. It is also heat resistant to  240° Fahrenheit.

Making all three sentiment squares the same would have been too easy. I used three combinations so you could see the difference. The photo on the left lists the ink underneath the piece and the embossing powder color above it.


At the far right is the combination from the recipe: Ranger™ White Super Fine Embossing Powder and VersaMark™ Ink Pad. In the center is the same powder over white pigment ink. And, the far left is white pigment ink with clear embossing powder.

What is your favorite color arrangement? Which embossing combination would you use? Answer in the comment section before  hopping over and see what Melissa has to share. (She also has a list of all the participants this month.)

These are the other products used, instead of or in addition to the recipe listed above:

X5990 Carolina Cardstock
X5987 Bluebird Cardstock
X6001 Emerald Cardstock
Z2045 All Purpose Mat
Z2863 White Pigment Ink
Z2088 Clear embossing powder
9044  Make It from Your Heart Volume 4
Z3314 Black & White Dots


Wednesday, May 15, 2019

Make the Cut!


WELCOME to the May edition of the Technique Blog Hop!!  This month we're featuring Thin Cuts and/or Cricut Collection cuts. Either one works for me because I do NOT like fussy cutting! If you ever receive a card from me with a hand cut-out image, consider yourself very special!

You may have arrived here after seeing Amazing Creations by Maz. 
After you're finished my post, click the link at the bottom to hop to the next consultant's page. If you get lost, there is a complete list on Melissa's blog. 

Don't forget to leave a comment below!


Do you remember??

I recently received a shipment with the adorable Wild & Punny stamp set and thin cuts bundle. When I first saw it in the catalog, it reminded me of my favorite cartoon clip. 


I wanted a "busy" paper and chose one from the new Craft On paper pack.

The blue strip is one of the zip strips. 

The pattern is #21 from Make It From Your Heart, Volume 4. 


To highlight the reptile shape, I embossed the image on vellum. It is attached to the paper with our Bonding Memories glue. This is my go-to product for vellum if I can't otherwise hide the adhesive.


Double Duty Tools


Don't forget, the All-Purpose mat works for both heat embossing and when gluing. The "sticky" side keeps embossing powder from contaminating everything nearby. It is also heat resistant! The shiny side cleans up easily and protects your work space.


Washi Tape not only makes for a fun embellishment, it is also a great crafting tool. Usually I use the Thin Cuts first and then stamp my image on the shape, but for this card, all the die cutting needed to be done on the "finished" papers instead of extra pieces.

For embossing the vellum I needed the extra margin around the image to  prevent smudging the lines before they were heat set. For cutting the shape from piece A and the Decorative Border on piece B, the die needed to stay straight and centered.

The Anti-Static Pouch is another one of those great tools you never knew you needed. It makes a huge difference when heat embossing. Swipe it across the paper before stamping to make sure all the embossing power sticks to the ink, not the paper. Throw it in the bag of new sequins to prevent them from displaying magnetic powers. And there's one more thing I use it for frequently...if you know, post in the comment section!


After I got started, I realized this is an eclipse card. 

Hopefully there is a traditional one on the hop this month. If not, I may come back and add one. They are fun, and addictive. 

FYI:  On my card, the popped up piece really needed the regular thickness of 3-D foam tape instead of the thin type. 


Sooo many choices!


I wasn't sure what to use for an embellishment on this card. While going through my supplies, I saw the Crafty Sequins. The Crafty Sequins include a large assortment of colors, finishes, and sizes, plus black flowers. I've used loose sequins as bling before and was excited to spend more time with the new Fine Tip Applicator for Liquid Glass! This tool is AWESOME! 

Tip: wipe the end off after each use. 

Animal shapes always bring googly eyes to mind. After quickly ruling it out in this case, I briefly considered adding a glimmer gem or similar item to the chameleon's eyes. Then I had one of my infrequent great ideas...


The eyes are the two smallest sequins sizes, used upside down and adhered with Liquid Glass. I just love this little guy and hope you do too!!


If you're ready to go shopping, the product links are below. Otherwise, leave a comment then hop over to see the creations of Miss Carrie!

Friday, February 15, 2019

Lovely Layers - CTMH Technique Blog Hop


If you've arrived from Terry's blog, you're right on track!

product imageThis month the Technique Blog Hop is focusing on "Lovely Layers." No, that's not what the fashionable people wear in Chicago when it's 50 degrees below! Here we're talking about layers of paper, ink, or even...Liquid Glass.

You'll find Liquid Glass under the tools section when shopping on my website. You may have used it for one of our National Papercrafting Month specials to secure flowers. For years, CTMH Consultants have been using it's adhesive super powers for even more, like repairing the sole on your shoe during convention! If you haven't seen my favorite example, just ask! It works great for securing ribbons on mini-albums. The opening allows you to place a fine line for attaching twine, or a dot to keep a sequin in place.


However, this amazing product is more than an adhesive,  Did you ever use it as an EMBELLISHMENT? As the name implies, you can use it to replicate glass on your projects. It forms a clear covering over an image. A few months ago, you may have seen snow globes with Liquid Glass. You can cover the entire image or highlight selected parts. It can be LAYERED on paper and complements. Above, I used it on the lens of the glasses from the Heart Happy complements.


You can also make a sheen on water surfaces. These pictures show an old pool layout where I used the  Liquid Glass on stamped water drops.


I mentioned using this amazing product with 3-D flowers. On this year's special, it was suggested to add a thin LAYER of Liquid Glass to the leaves, to give them a sheen similar to real Magnolia leaves.


For my blog hop artwork, I made a card using the Egg-stra Special bundle and Decorative Borders thin cuts. The color combination came from the So Much Happy collection.


I used two Easter Eggs on the card, but in preparation I LAYERED the Liquid Glass several ways:
  1. I colored some areas with Shin Han markers and used Liquid Glass to accent them.
  2. I covered the entire image. 
  3. I highlighted stamped spots. 
  4. I colored some areas with Shin Han markers and used Liquid Glass to accent them.
  5. I suggest using Intense Black ink with Liquid Glass. Some ink and marker colors may run, usually the darker shades. By working with one section at a time, this is easily avoided. 
I like to cut my die shapes before I stamp them, but I did save one egg and cut the shape after it was covered with Liquid Glass. I had to use washi tape to hold the die in place, but there didn't seem to be any other issues. One more FYI:  Liquid Glass may change the color of dye ink. I didn't notice this with any of the colors I used, but I remember it being an issue with some of the retired reds (they looked orange).

When working with Liquid Glass, use the All-Purpose Mat. Not only will it protect your work surface, but your project won't accidentally become glued to anything else. And, any spillage will pop right off after it dries!


You may have noticed that the eggs curled a bit from the Liquid Glass. This didn't cause any problems, in fact, one of my "failures" may give someone else an idea for a new technique. This is another nice feature of Liquid Glass, it stays flexible, not brittle, after drying. The piece to the right has MANY individual LAYERS of Liquid Glass and was purposefully bent, it didn't become this deformed from the application of the product.


Don't you just love our two-toned cardstock?! I used both shades of Clover for the LAYERS of "grass" and the lighter side for both egg shapes. I used the Peach ink on the lighter side of the Peach cardstock to give the tone-on-tone stamping more contrast.


Did you see the bunny's paws? I made these using the ears stamp and thin cuts, then I added little lines with a journaling pen. I also used the egg die and put them through the Cuttlebug to trim them to size.


Thank you for stopping by! Please leave some love in the comments below before continuing to  Melissa's page. (She also has the list of all participants in case you get lost hopping around.)


Products used on Easter card:
  • Z697 Liquid Glass
  • Z4262 Egg-stra Special stamp and thin cuts
  • Z4241 Thin Cuts-Decorative Borders
  • X6027 White Daisy Cardstock
  • X5986 Mint Cardstock
  • X5995 Clover Cardstock
  • X5988 Peach Cardstock 
  • X6008 Lemon Cardstock
  • X254 Value Pack card bases and envelopes
  • Z2461 ShinHan™ Touch Twin™ Peacock Green Marker BG61
  • Z4189 Intense Black Exclusive Inks™ stamp pad
  • Z6502 Peach  Exclusive Inks™ stamp pad
  • Z2895 Lagoon Exclusive Inks™ stamp pad
  • Z1979 Marvy® Uchida® LePen™ Journaling Pen


Monday, October 15, 2018

Paste-fully Creative - CTMH Technique Blog Hop

Welcome to my first entry in a Blog Hop! And welcome to The Scrap Buzz, new visitors!!

If you have arrived here from  Maz Wood: aMAZing Close to my Heart Creations, you're in the right place. If you get lost, a full list of participants can be found here.

Theme Photo for Paste-fully Creative CTMH Technique Blog Hop
In case you missed it, there are several options for purchasing texture paste. The products are offered separately, or as part of the Boutique Deluxe Bundle which includes the Palette Knives, larger 3.9 jar of Opaque Matte,  a package of Stencil Sheets and a Sugarplum Shimmer Brush. You save 10% by purchasing the bundle.

We also offer a Texture Paste Trio of 1 oz jars in Transparent Matte, Transparent Gloss and Opaque Matte.


I was planning another technique and a school theme, but before I finished with paper selection I had a new idea. Could I make a hand print with texture paste? The answer is YES!

Scrapbook page with Kindergarten school photo and Texture Paste handprint

Texture Paste How To

I played with several variations, but a straight forward method was the best choice. Initially I was looking for a fine image like what you would expect with ink, similar to a finger print. The paste gives a fun textured image similar to paint.
    close-up of child's handprint made with Texture Paste on a scrapbook page
  1. "Butter" your hand with one of the Palette Knives, just like you would do bread. This should be a medium thickness. About half will transfer to the paper; the other half will remain on your hand.
  2. Just like stamping, press your hand straight down and after a few seconds, remove it straight up.
  3. Happy with your image? Texture Paste is great for us perfectionists because it's never going to be "perfect," so unless you're missing a finger, it's probably good to go!
  4. Scrape the excess paste off your hand with the Palette Knife or clean with a baby wipe, then wash thoroughly with soap and water. The paste is non-toxic in addition to acid-free. 
  5. Don't forget to replace the lid on the jar and clean up your knife and work area while the paste is wet. Set your project aside to air dry. I let mine sit overnight. 
Note that I left the paste white, straight from the jar. If you mixed the paste with color, you might have a colored hand for a few days!

close-up of embellishments used on Kindergarten school picture scrapbook page
Close-up of Cricut-cut shadow images title raised with 3-D foam tape


There are some tips below that cover a few issues I had when putting this page together. Please leave a comment before you head over to see what Vandra has to share.

Tips for Easier Tool Use

Cuttlebug Tip:  At the Annual CTMH North America Convention this year, we were told that on the Thin Cuts notebook edge it's hard to tell which is the positive and negative images. So, it's helpful to mark your die once you know which is which. (BTW-Sharpie will come off onto your C plate.) Also, to repeat the cut on a longer piece of paper, overlap just the very ends of the die. You may wish to use a piece of Washi Tape to hold things in place. I also suggest you start in the middle of the paper, then fill in each end so you don't have a little short piece to cut.

Tip for using the notebook edge border thin cuts from CTMH on a Cuttlebug

Tip #2: The Texture Paste can cause your paper to warp. You may be able to prevent this by using Washi Tape again. Attach your paper to the All-Purpose Mat. I didn't remember that so my paper was no longer flat (left side).

before and after pictures showing fix for warping caused by Texture Paste

I fixed it by spraying a little water on the BACK of my paper with a Spray Pen. It was moist, not wet. Then I washi taped it to my Versamat and let it dry. That did the trick (right side)!

Thanks for stopping by!

                  Tamara


Products Used