
Thank you for joining us in our monthly Technique Blog Hop. For January, we're spotlighting "Terrific Treats." Go from blog to blog by following the links to see all the fun ideas we have to share. Valentine's Day is only a month away!
If you've arrived from visiting Miss Carrie, you're in the right place. If you get lost, you can find a list on Melissa's blog.
Did you know...we carry products that aren't found in either of the current catalogs?! There are two specific areas to find these on my website: Clearance and Online Only. There are so many "extra" products that the latter category is subdivided!
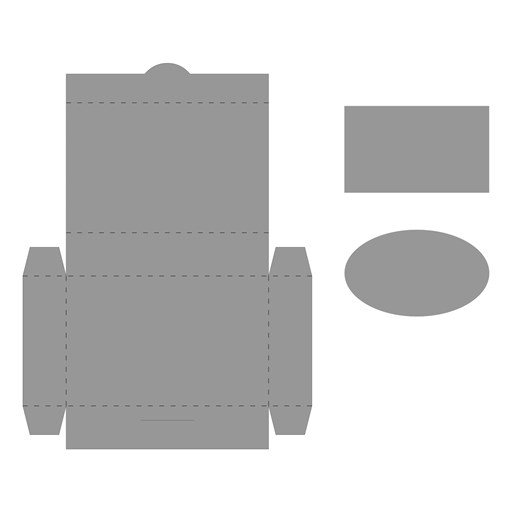
I decided to use one of these "bonus" products, Gift Card Box Thin Cut, this month for my project. Surprisingly, there aren't many ideas online using this die. Let's change that! If you have ideas, share them! My project was so simple, I thought this post might be short. But, once I started taking pictures, I thought of all sorts of things to share!
The box die comes with two other shapes: an oval and a rectangle. These can be used to make a window in the box or to cut an additional layer for embellishing your box. But, for Valentine's, I had to use a heart!
This is one of four sizes in the Basic Hearts Thin Cuts set. If you're making a window, the heart (or oval or rectangle or ??) can be run through your die cut machine at the same time you cut the box. If you want your window to be "closed," add a piece of acetate or vellum inside the box. You can also cut the shape from a different paper, or turn the shape over, for contrast.

For my first box, I used one of the new papers from the January/February catalog. Celebrate Today is full of bright, cheery colors. One of the paper patterns is this fun watercolor. I used a Zip Strip around my box; it is the perfect size! What fits in these boxes? I found a few things in my treat basket that fit well including a package of Pop Rocks (folded).

These boxes are the perfect size to pair with the cards in the Oh My Happy workshop! The envelopes included are Pixie, one of the colors in Celebrate Today. I didn't like the pink box on pink envelope, but I love the floral on pink! A little box of Red Hot candies is inside this one. Many sizes of packaged chewing gum will also fit. I suggest you take a box with you when shopping as packaging varies immensely from location to location.

I wanted to try a box with plain White Daisy cardstock. This would be an easy way to involve the kids...they could stamp or color, or color stamped images, etc. Since there are no little ones at my house, I found another way to dress up the white. I used an embossing folder and then colored the raised images with ink. (If you are looking for coloring ideas, come back next month when our theme will be "Color Your World.")

Here are the steps:
- Cut cardstock into 5x7 pieces.
- Emboss the paper.
- Using the Direct to Paper technique, color the raised side. (Rub the ink pad over the paper.)
- Use the Gift Card Box Thin Cut to cut out the shape (and window if desired).
- Assemble the box.
- Embellish.
- Fill.
- Share!!

Also note: you can get four 5x7 rectangles out of one piece of 12x12 cardstock.
It looks like the die won't fit, but it will! Just make sure the 5" are between the outside cut edges. I cut my boxes upside down (paper on top of die) to make sure the paper was placed correctly. Also, when you make large, straight cuts, remember to angle your die so that there is a gradual leading edge going into the die cut machine. (I have a Cuttlebug.)

For this box, I used the oval AND rectangle shapes layered on top. The "to" and "from" are from the Oh My Heart stamp set CC12013. There are 37 stamps in this set!! Around this box is a piece of Candy Apple Striped Ribbon. Remember my ribbon trick from last month's blog hop? Well, if you thought it was hard to tie ribbon around a piece of paper, you won't want to try it around a paper box! Remarkably, this box is almost the same size as the 2" x 3.5" Block. It fits inside perfectly!! If you are giving crafty gifts, this would be a fun way to wrap a block!!
Here's another tip: To keep your ribbon from unwinding between uses, simply put a rubber band around the spool! I used to use pins, but they tended to get in the way, or misplaced.


My favorite treat for these boxes is the Dove Promises candy! This time of year you can find the heart shapes. The regular shapes fit too, however, they are not quite square. They fit with the longer edge across the long side of the box. The specially wrapped Valentine's theme look weird to me since the letters are going in the wrong direction.
If you don't need to make bunches of these, we found the small Dove bags at Dollar Tree.
 Speaking of directions, if you use directional paper (words or lined up hearts) pay attention to which way your are cutting your box. One of the reason's I didn't use the Word Search embossing folder (which is on Clearance!) is because I placed the die going the wrong way.
Please leave a comment before hopping over to see what aMAZing project Maz Wood is sharing this month.


